How to Extend the vRSLCM Disk and resume patch download
This article describes what to do when you run out of storage in vRealize Suite LifeCycle Manager (vRSLCM). In my case this was triggered by starting to download the vRA 8.0.1 Patch 1

In vRSLCM you see the message “Disk Usage of the system is very high at 100%. To avoid failures please extend storage from system details page.”

First step to take is to extend the disk, which is easy by clicking on “Extend Storage” and supplying the desired amount of GB’s you want to add.
Unfortunately, after you extend the disk, it is not possible to retry the download the patch request. The error you get is:
Error Code: LCMPATCHDOWNLOAD16001
Failed to download lcm patch. Please check logs for more detail.
Patch is already in downloading or downloaded state.
If you go to binary mapping you see a task that is still in progress.

A reboot of vRSLCM does not solve this, but luckily there is VMware KB76688 [link] to the rescue.
Update 30/03/2020: VMware has now included a Python script that can be run on the vRSLCM appliance to fix this problem the easy way. For reference I’ll keep the original instruction on how to fix this below:
Since not everyone might be very familiar or comfortable with the workaround provided, I decided to add some extra info and screens to clarify. First you must open an vRSLCM API session from your browser:
https://<fqdn of your vrslcm host>/api/swagger-ui.html
From there you can find the section “content-download-controller”
Underneath this you can find several possible API requests. Look for the one called:
[POST] /lcm/crepo/api/contents/download
Click on “Try it out”
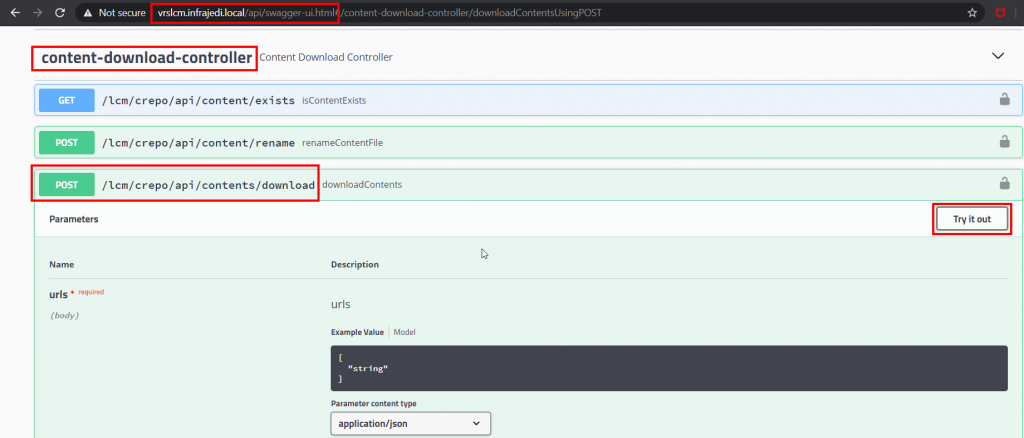
You can now add your payload value in the field. The KB describes this in general format:
[
  "/productPatchRepo/patches/{productId}/{productVersion}/patchProductRegistry.json"
]
Where productId will be vra, vrlcm, vrops, vrni, vrbc, vrli and product Version: 7.5.0, 8.0.0, 8.0.1, … etc.
In this case, this translates to the following
[
  "/productPatchRepo/patches/vra/8.0.1/patchProductRegistry.json"
]

Click on the blue “Execute” button to execute the call.
If all goes well, this is the result.:
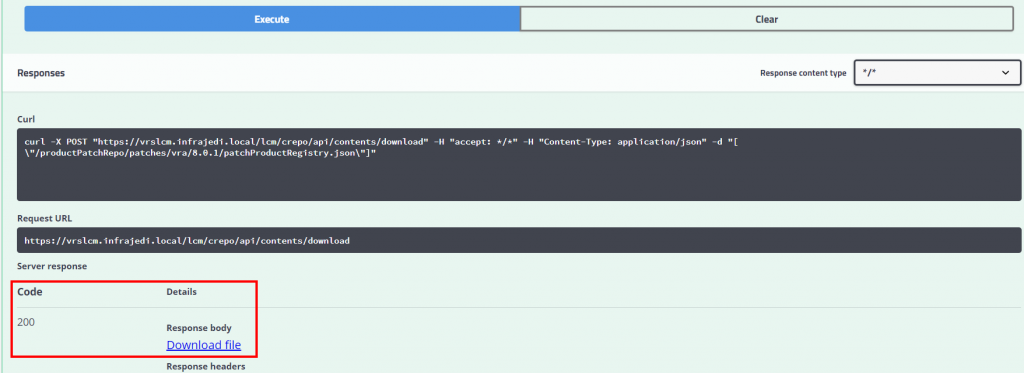
Click on the “Download file” link, to download a file called “contents.zip”
Extract the file and look in the extracted patchProductRegistry.json for the keyword “DOWNLOADING”.

Change “DOWNLOADING” to “NOTAVAILABLE” and save the file.
The next step is to upload the json file via another API call which can be found under the section content-repository-controller.
Look for [POST] /lcm/crepo/api/replace
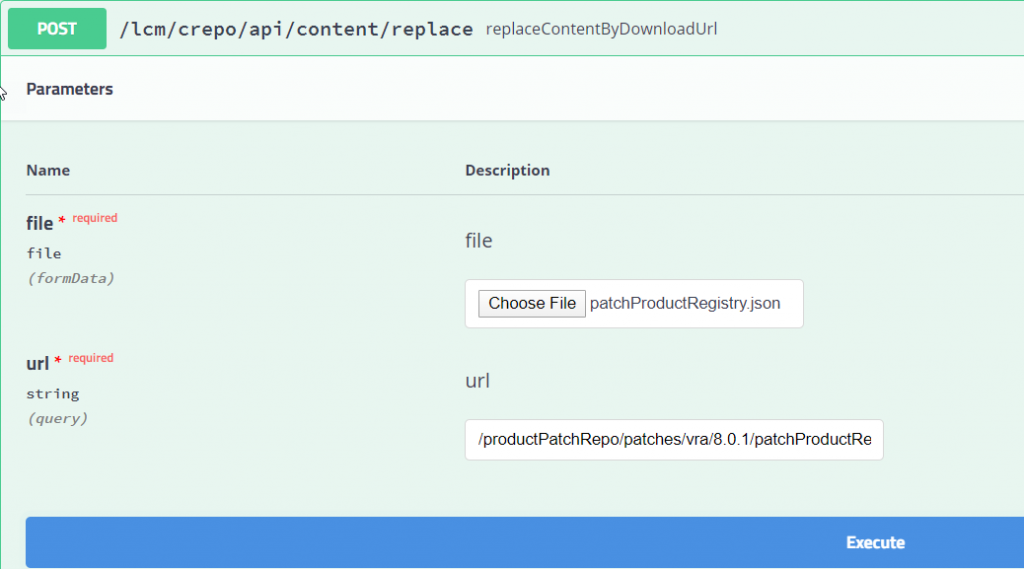
Browse to your edited patchProductRegistry.json file
For the url you must enter the url from the request api used before:
/productPatchRepo/patches/vra/8.0.1/patchProductRegistry.json
Click Execute and check the Response

If all went well, go back to the vRSLCM GUI.

You should now be able to start the download request.

Happy patching!




1 Response