Upgrade from vSphere 8.x to 9.1
This blogpost describes the upgrade from vSphere 8.x to 9.1.
Why would someone go this route or VVF and not VCF you might ask? Well, even large customers have smaller environments that are (needs to be) completely disconnected from the main site. Note that even in most of these scenarios a VCF Edge design would be a perfect solution. See the documentation for the [VCF Edge Options and Patterns].
The best start for upgrading from vSphere 8.x to anything 9 is the [VCF Upgrade Planner] and the [Deployment, Convergence, and Upgrade] documentation. From the documentation there are two non-VCF options to upgrade to 9.x:
- Upgrading vSphere 8 and Optionally Aria Operations 8 to 9.1 [link]
- Converging to vSphere Foundation (VVF) 9.1 [link]
Upgrading vSphere 8 and Aria Operations 8 to 9.1
According to the documentation: “If you have an existing vSphere 8 environment that also has Aria Operations 8. and you want to upgrade to 9.1 but you are not yet ready to deploy the entire VCF 9.1 stack, see Upgrading vSphere 8 and Optionally vSAN and Aria Operations 8 to 9.1. Follow this scenario only if your environment has just vSphere and optionally vSAN and Aria Operations components and no SDDC Manager, NSX, or other Aria components. This scenario takes you to a stable environment that can later be extended to full vSphere Foundation or VCF 9.1 environments.”
VCF Operations and the license server components are required to license all 9.1 environments. If you do not have vRealize Operations to upgrade to 9.1, you deploy VCF Operations 9.1.
From the VCF Planner Tool this is the upgrade workflow

The procedure to get there (with links to the documentation):
| # | Component | Getting to version 9.1 Procedure |
| 1 | Upgrade Aria Operations 8.18 and later or deploy VCF Operations 9.1 | Upgrading to VCF Operations 9.1 |
| 2 | Deploy license server | Add License Server Manually to VCF Operations |
| 3 | Upgrade vCenter 8 Update 3 and later | Upgrade the vCenter Instance |
| 4 | Upgrade ESXi hosts 8 Update 1 and later | Upgrade the ESX Hosts |
| 5 | vSAN On-Disk Format Versions | Upgrade vSAN On-Disk Format Versions |
| 6 | vSAN File Service | Upgrade vSAN File Service |
Upgrading to VCF Operations 9.1
The first step is to upgrade the existing Aria Operations 8.18.6 environment. If you have already upgraded to 8.18.7, there is currently no upgrade path to VCF Operations 9.1.
[Download] | [Release notes]
Open the Aria Operations admin interface https://<operations fqdn>/admin
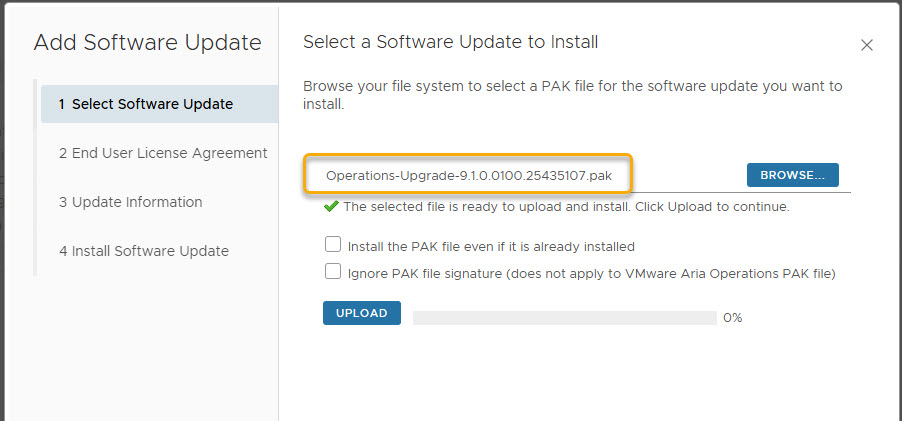
=> Software Update -> Install a Software Update
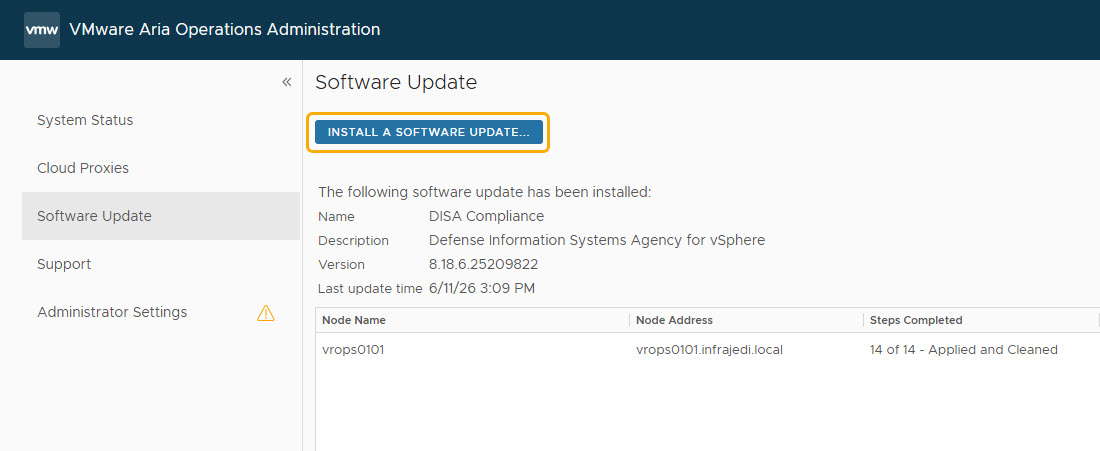
=> Upload the Operations-Upgrade-9.1.0.0100.25435107.pak file
Note: During install/upgrade the Operations interface is not available.
Note: After uploading the staging of the upgrade file(s) can take quite some time
After some time the installation was completed successfully.
Although the upgrade was successful, I Noticed the following error message after installing on the VCF Operations VM Console: “The password for the ’root’ user account has not been configured due to complexity requirements. Use KB article 325005 to reset the password.”
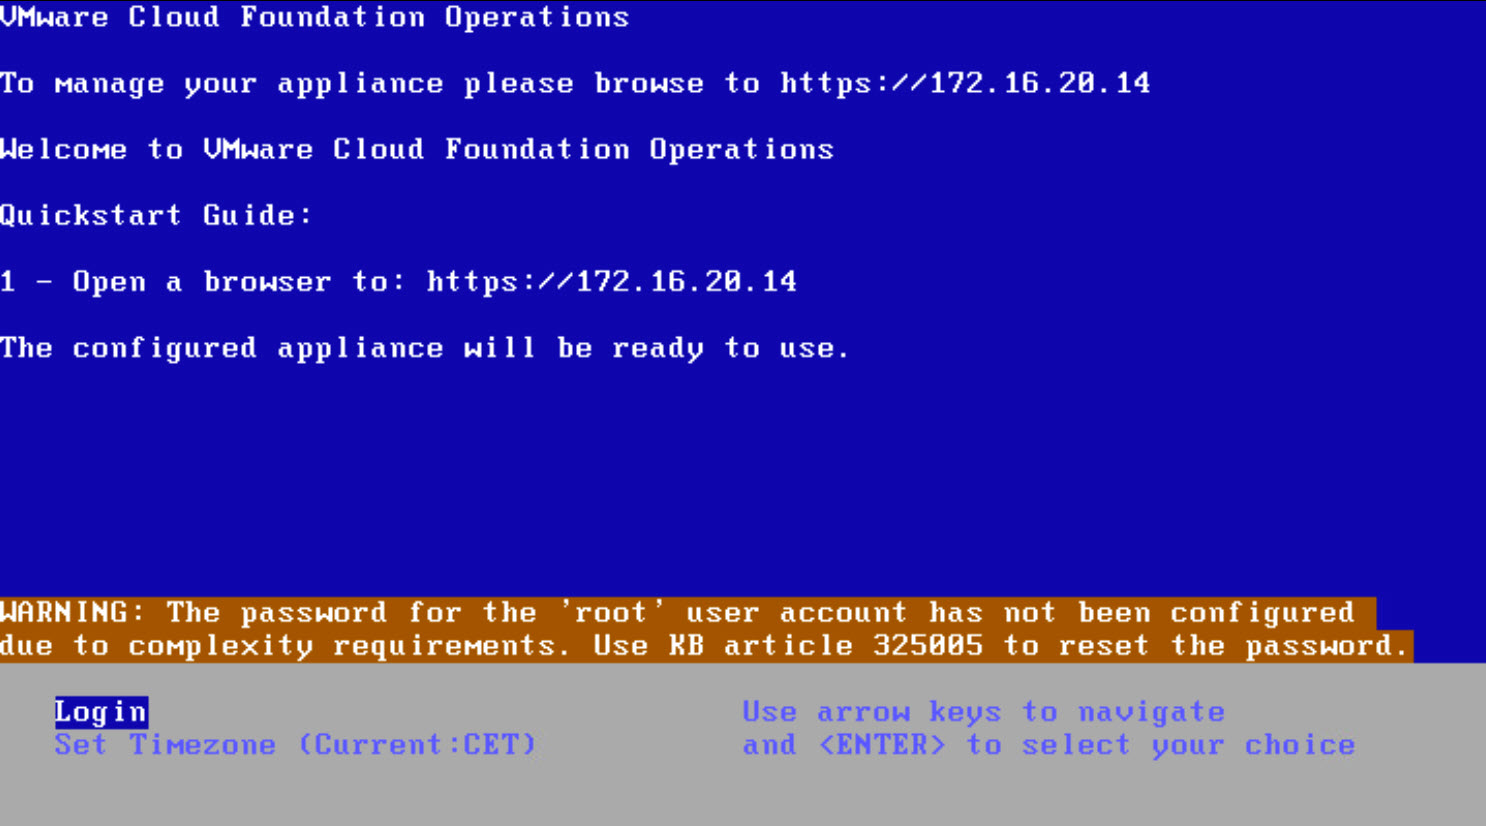
I followed [KB325005] – How to Reset the Root Password for VCF Operations:
=> Boot the VM into grub bootloader by pressing the ’e’ key during boot and edit the file as described.
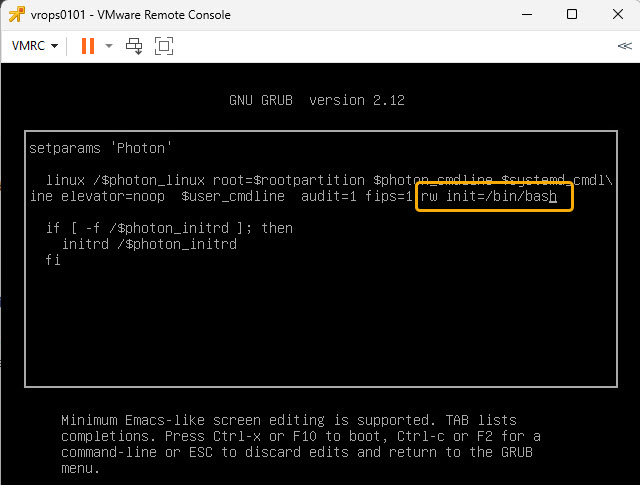
=> Note: the new password needs to be at least 15 Characters and must meet password complexity
=> Note: If you have multiple Ops nodes repeat this process on all of them.
Download & Deploy License Server
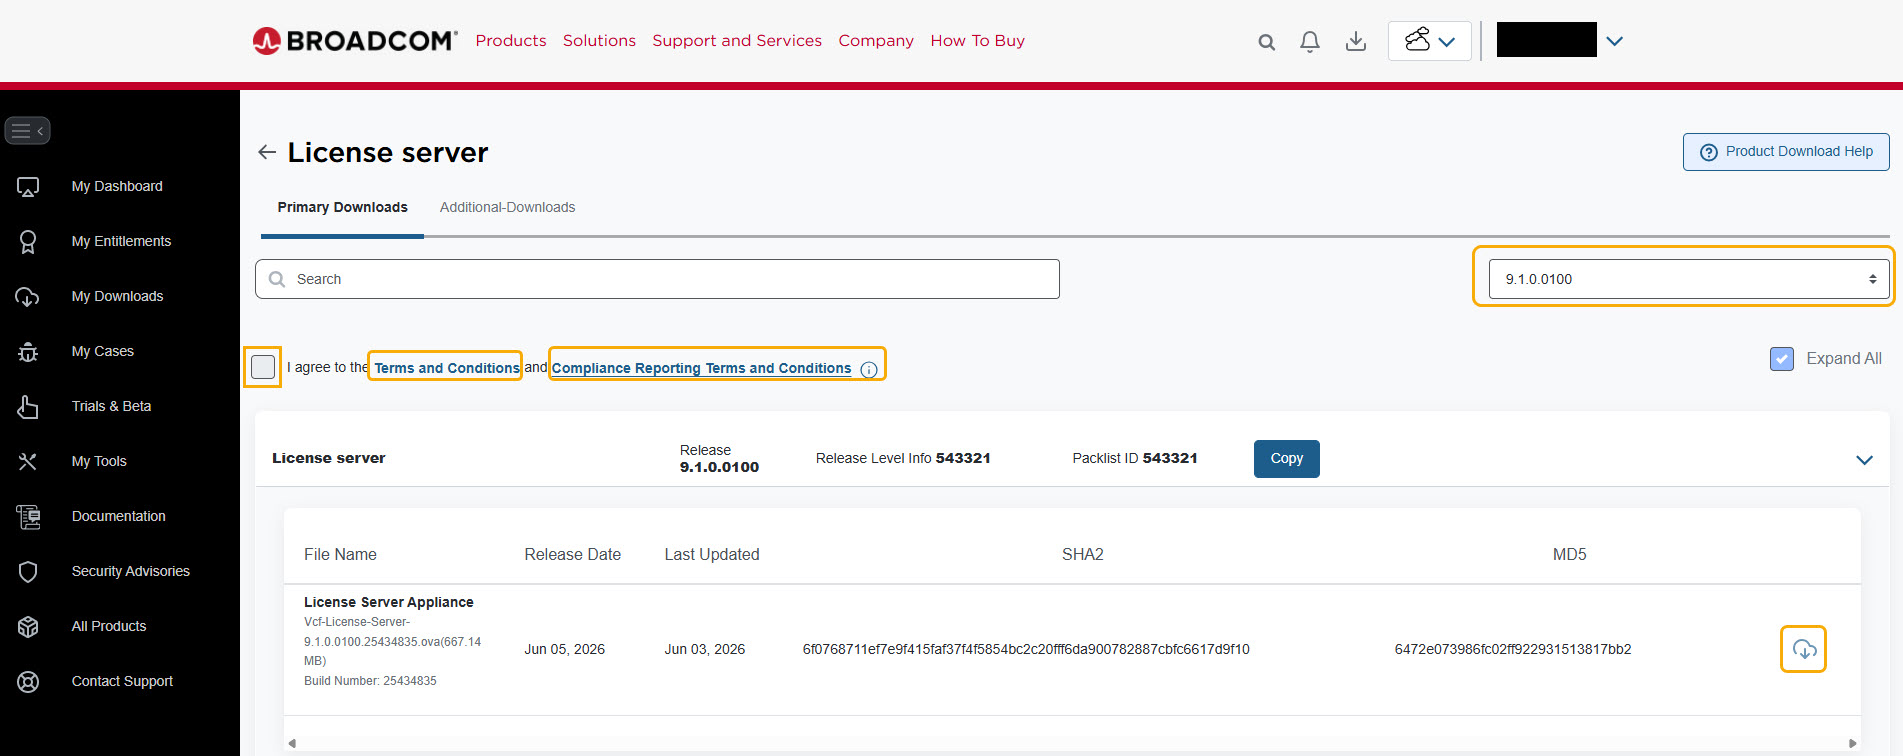
Step 2 is to download and deploy the License server. [Reference]
[Download] | [Release notes]
Don’t forget to click both the “Terms and Conditions” and “Compliance Reporting Terms and Conditions” link, as you won’t be able to select the “I agree” box and download the .ova file. In the screenshot you can see the 9.1 EP1 (9.1.0.0100) release, but I used the 9.1.0 release.
The deployment and configuration of the License Server looks familiar to deploying the Ops Cloud Proxies.
=> Open Aria Operations web interface https://<operations fqdn>
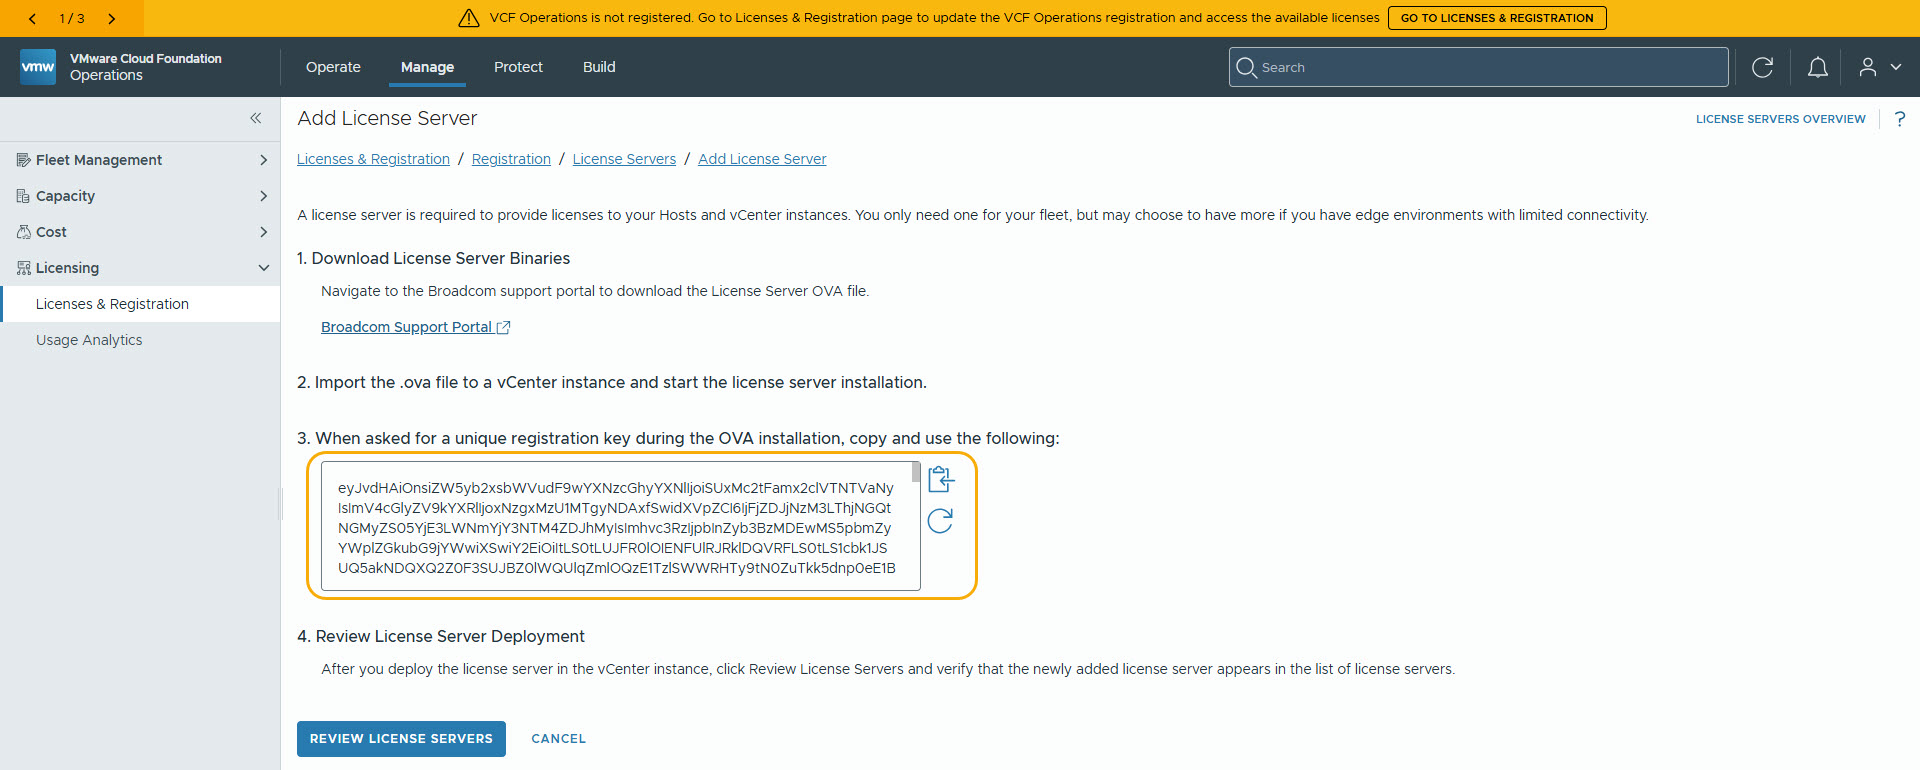
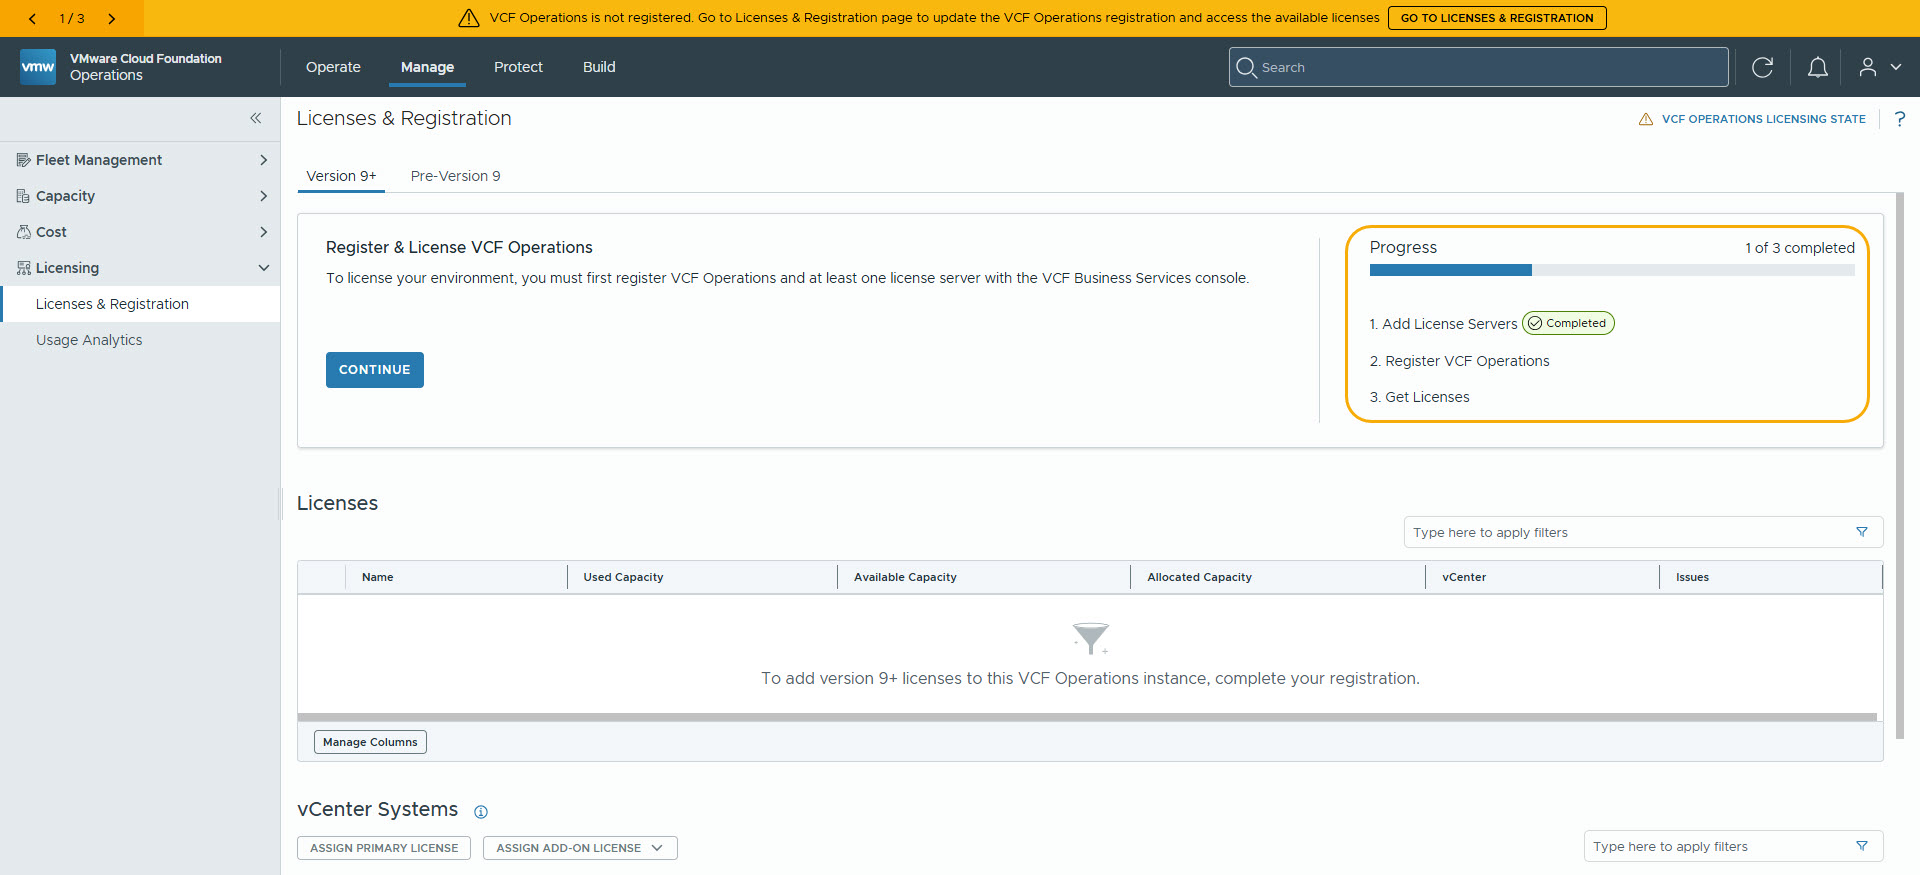
=> Manage (tab above), Licenses, Licenses and Registration
=> Create a unique registration key to be used during License Server installation.
=> Open vCenter web interface https://<vcenter fqdn>
=> Deploy the License Server as you would normally deploy any .ova file
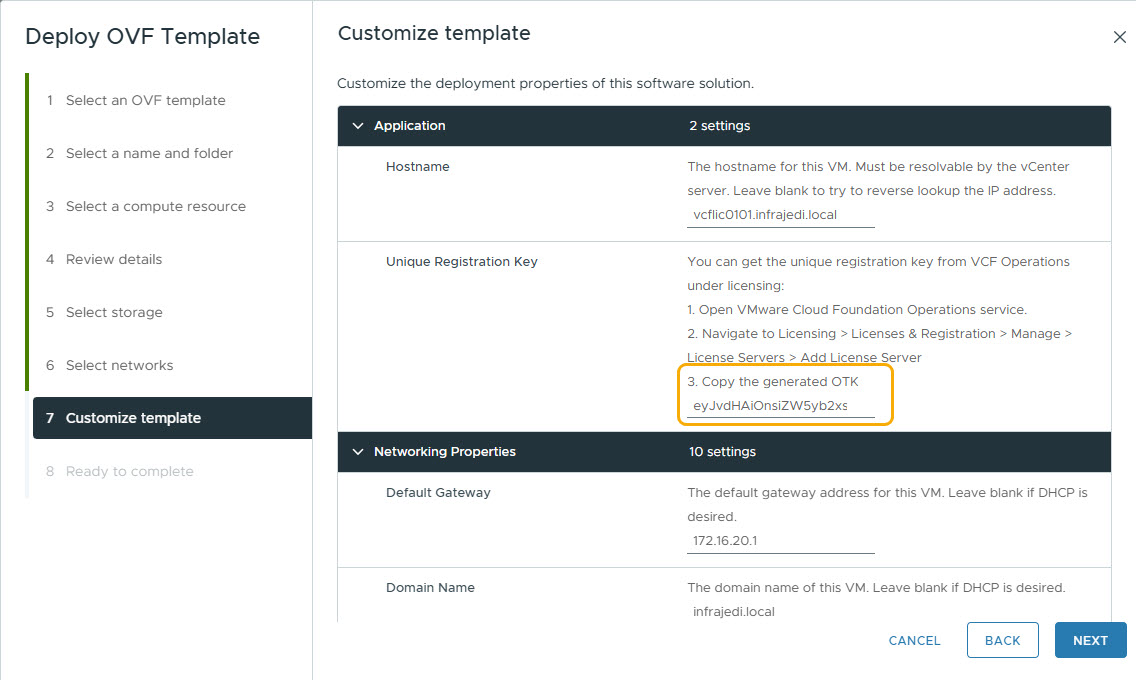
In step 7, Customize Template, you can paste the Registration Key generated in VCF Operations:
After the License server is deployed, you should be able to see it in VCF Operations.
Register VCF Operations Generate License file in the VCF Business Console
After deployment of the License Server, you can now register it in the Broadcom VCF Business Services Portal (BSP). I choose for Disconnected Mode (since that is the only way for me as Broadcom employee). The steps for registering in Disconnected Mode are:
- Download Registration File (VCF Operations)
- Upload Registration File (VCF BSP)
- Download Verification File (VCF BSP)
- Upload Verification File (VCF Operations)
- Download confirmation File (VCF Operations)
- Upload Confirmation File (VCF BSP)
- Download License File (VCF BSP)
- Import License File (VCF Operations)
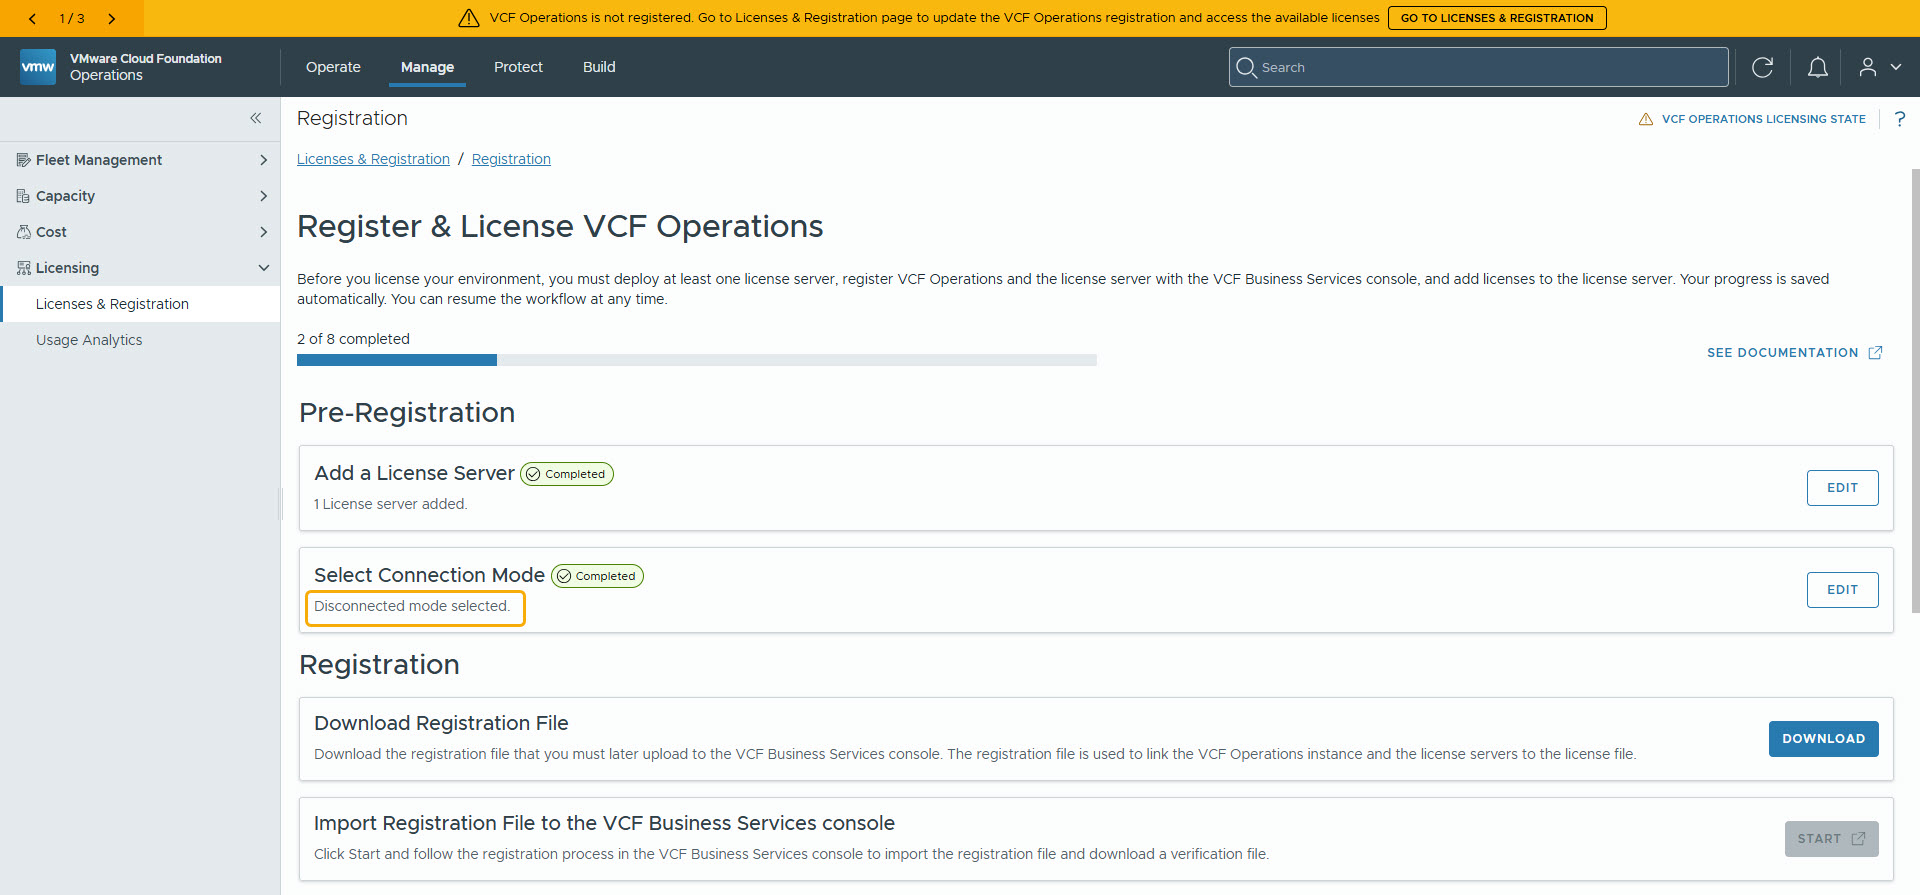
Note: during some in the above workflow steps there is a “Start” button which opens a Browser to the VCF BSP. Obviously in a disconnected environment this won’t work. However, you have to click to button to proceed in the VCF Operations interface (and open the VCF BSP on another, internet connected, machine).
Assign Primary License in VCF Operations
=> Go to Manage (upper tab)
=> Licenses & Registration, Version 9+
=> vCenter Systems, Select vCenter
=> Click Assign Primary License
=> Click Assign Add-on License, vSAN
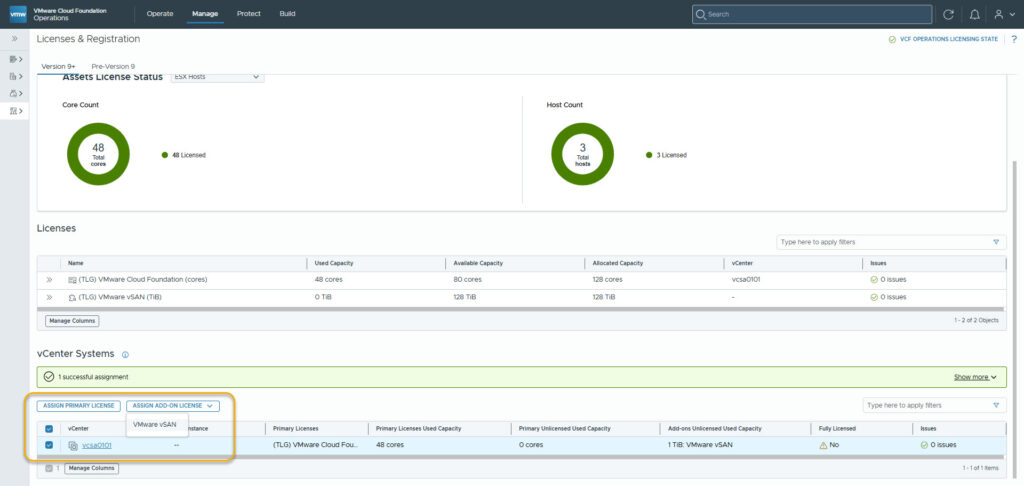
After this has completed remove the old licenses in vCenter and VCF Operations:
=> In vCenter, remove old Pre-Version 9 Licenses
=> In VCF Operations, remove old licenses
vCenter Upgrade
Step 3 is to download and upgrade vCenter [Reference]
[Download] | [Release notes]
This is a familiar procedure as you probably have do multiple times: The upgrade of the vCenter appliance is a migration of the old version to the new version, which includes deploying a new vCenter appliance of version 9.1. You can deploy the new appliance on an ESX host 9.0 or later, or on the inventory of a vCenter instance 9.0 or later. You assign a temporary IP address to the new appliance to facilitate the configuration and services data migration from the old appliance to the newly deployed appliance. After the migration, the IP address and host name of the old appliance are applied to the new upgraded appliance of version 9.1. At the end of the upgrade, the temporary IP address is released and the old appliance is powered off.
Upgrading the appliance is a two stage process. The first stage involves deploying a new vCenter to the target ESXi host or a compute resource in the target vCenter. The second stage completes the upgrade process by copying data from the source appliance to the deployed vCenter. Make sure you have backed up all data on the source appliance before starting with the upgrade process.
=> Mount the vCenter Installation .iso file “VMware-VCSA-all-9.1.0.0.25370922.iso”
=> Start the installer \vcsa-ui-installer\win32\installer.exe (for Windows)
=> Choose Upgrade
Nothing exciting on the upgrade procedure. Just make sure the new vCenter appliance with it’s temporary IP address can reach the ESXi host over the network (port 443) that is running the current vCenter.
Upgrade ESX
Step 4 is to download and upgrade ESX(i) 9 [Reference]
[Download] | [Release Notes]
For production environments, you should check if your hardware is on the HCL. In my lab environment, I just gave it a go 🙂
=> In vCenter import the ESXi Offline Bundle (VMware-ESXi-9.1.0.0.25370933-depot.zip).
=> Create a Cluster Image with the imported ESX release and assign it to the cluster.
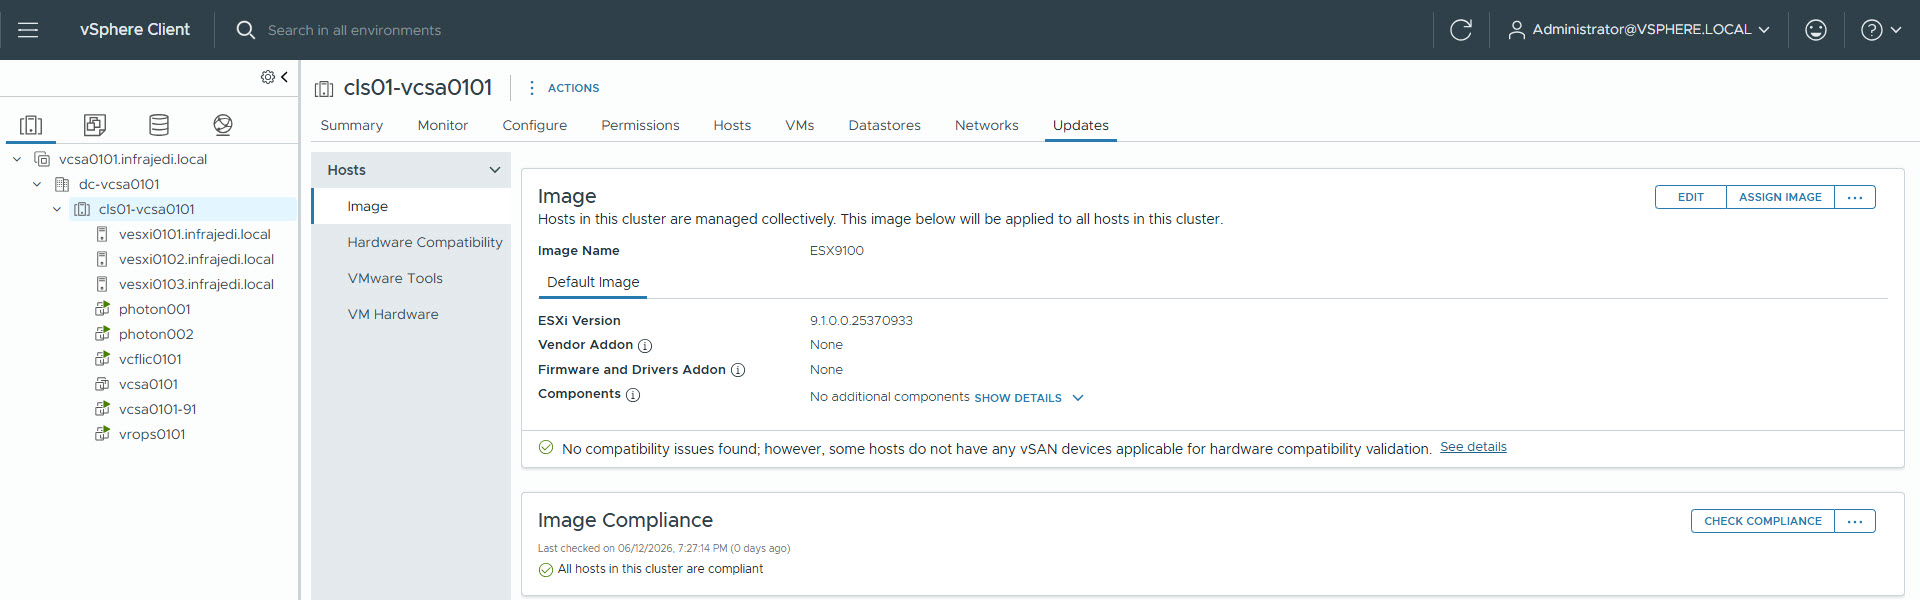
=> Run the Compliance Check and upgrade the Hosts
Also nothing exciting to mention here.
Upgrade other components
The finalizing part of the upgrade consists of the following steps:
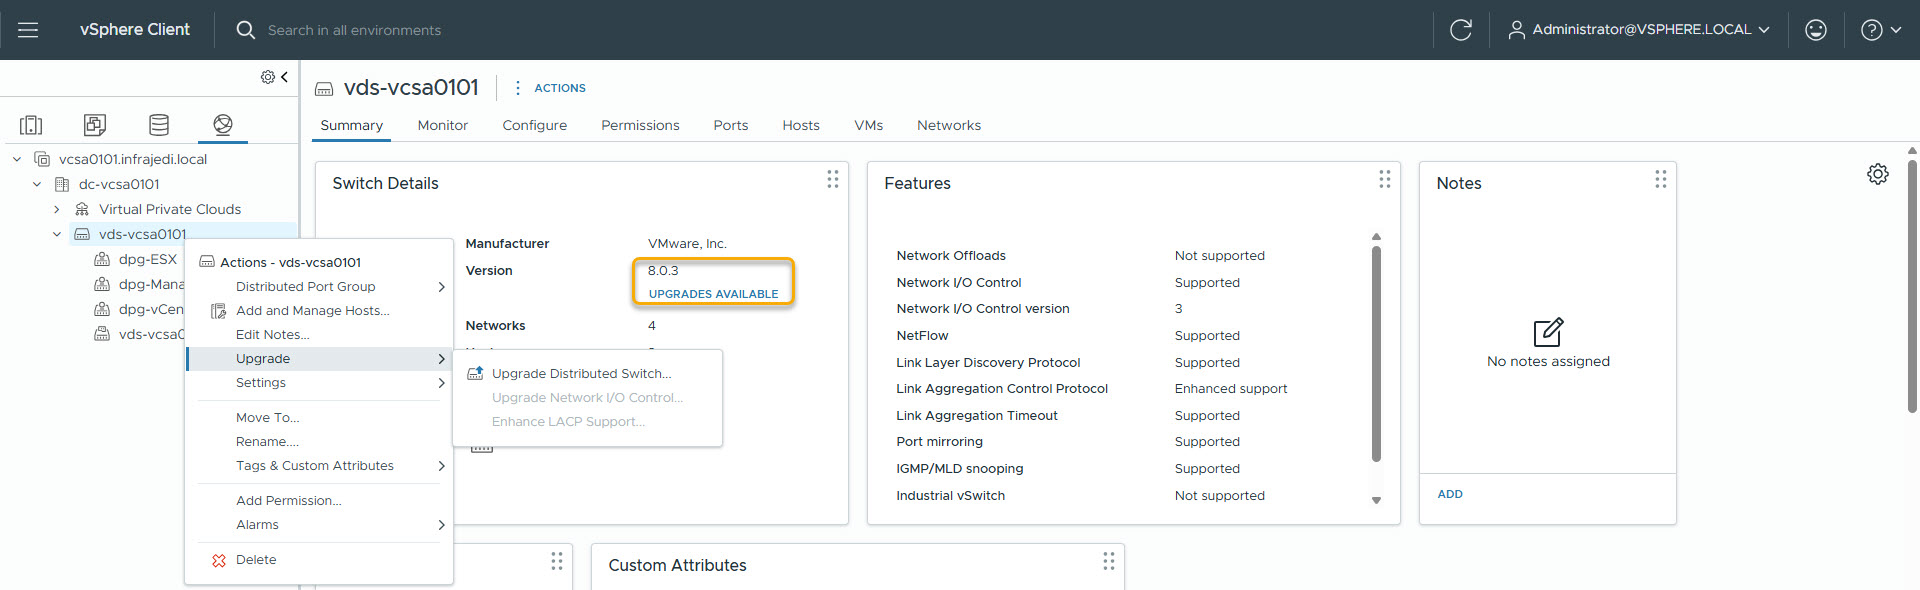
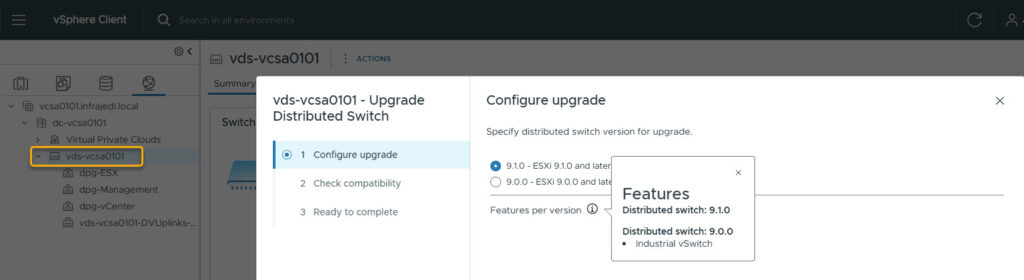
- Upgrade Virtual Distributed Switch [Reference].
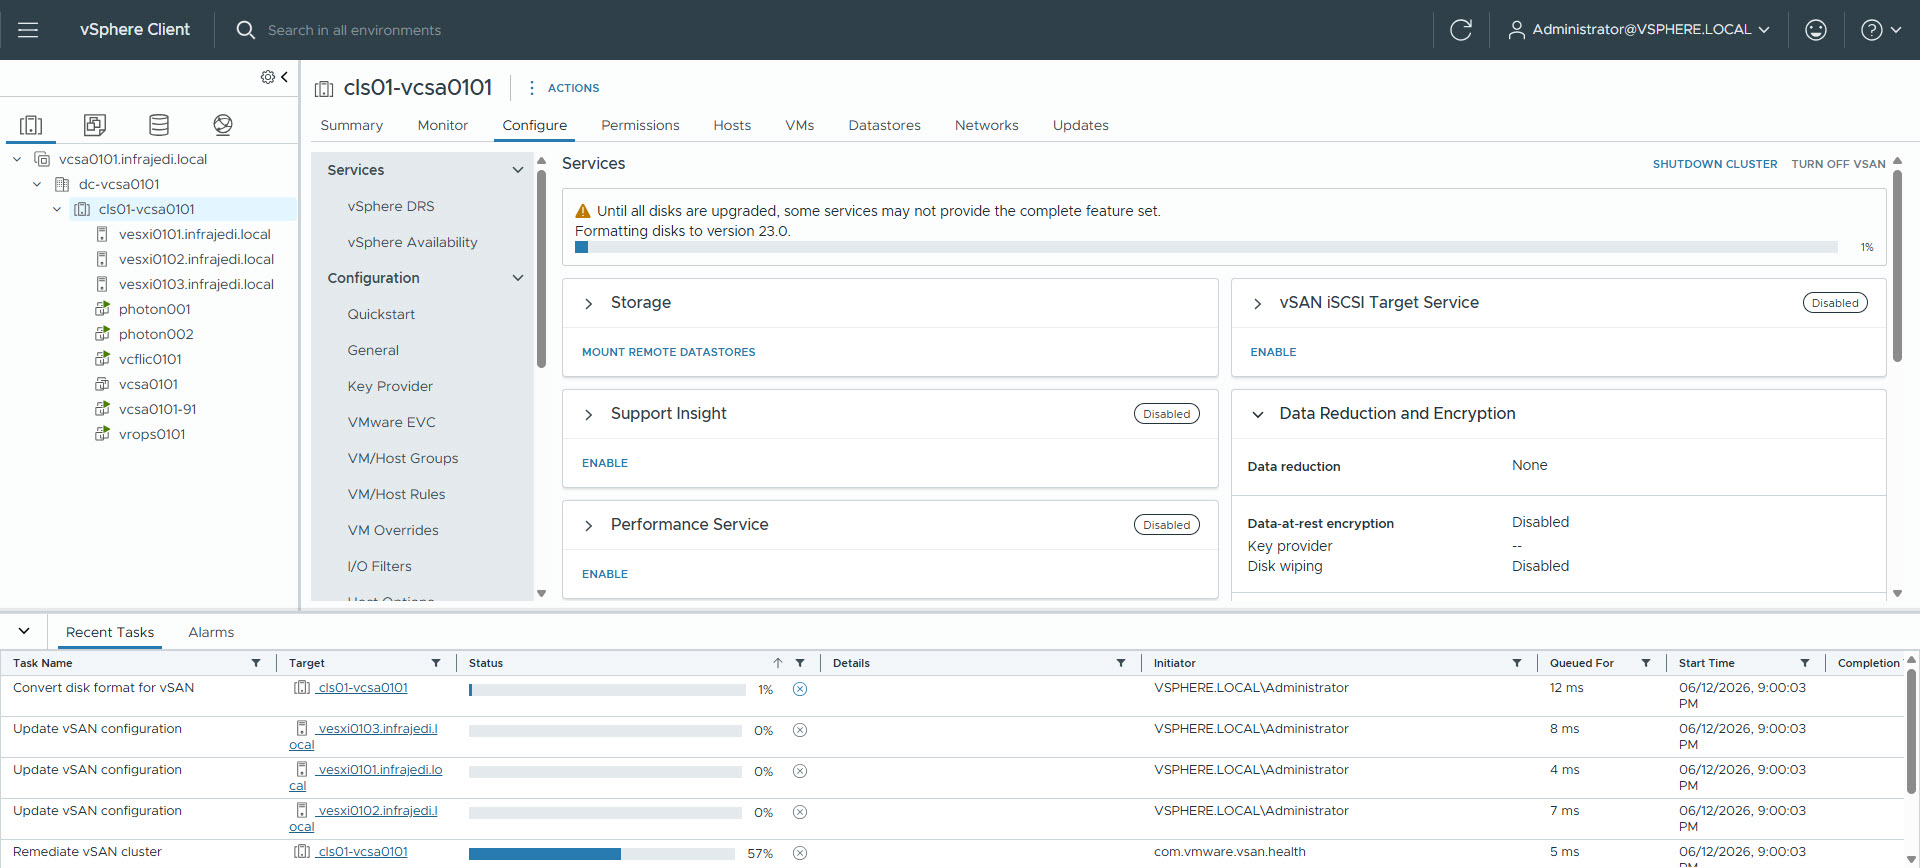
- Upgrade vSAN On-Disk Format (Optional) [Reference].
End of blogpost. Hope this was useful.