vRA8 Infoblox Integration
Update: 04-may-2020; updates links/versions.
This article describes the basic setup for the vRA 8 Infoblox integration.
Official VMware documentation about this topic can be found at the following link: “Add an external IPAM integration point in vRealize Automation Cloud Assembly” [link]. Infoblox has written a Deployment Guide which can be found here [link].
The new v1.1 vRA Infoblox Plugin can be downloaded from the VMware Solution Exchange [link].
Import Infoblox provider Package and configure the Infoblox integration
Let’s start with adding the Infoblox Provider Package and then configure the Infoblox integration.
- Log in to Cloud Assembly, go to Connections, Integrations
- Click “Add Integration” and Click on the IPAM icon.
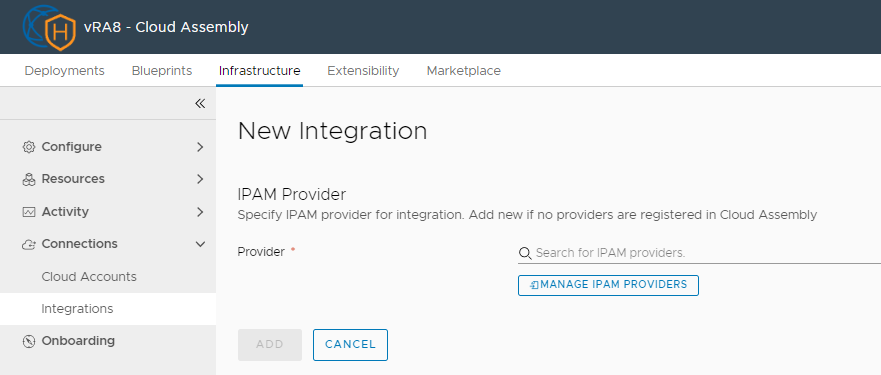
- On the New Integration window, click on “Manage IPAM Providers”.
- On the “Manage IPAM Providers” screen Click on “Import Provider Package” and point to the file “Infoblox-with-dependencies.zip” you have downloaded from the VMware Solution Exchange.
After import, you should see the Infoblox Provider:

- Click Done to go back to the previous screen.
- On the New Integration page, you can now select the Infoblox IPAM Provider and configure the Infoblox endpoint.
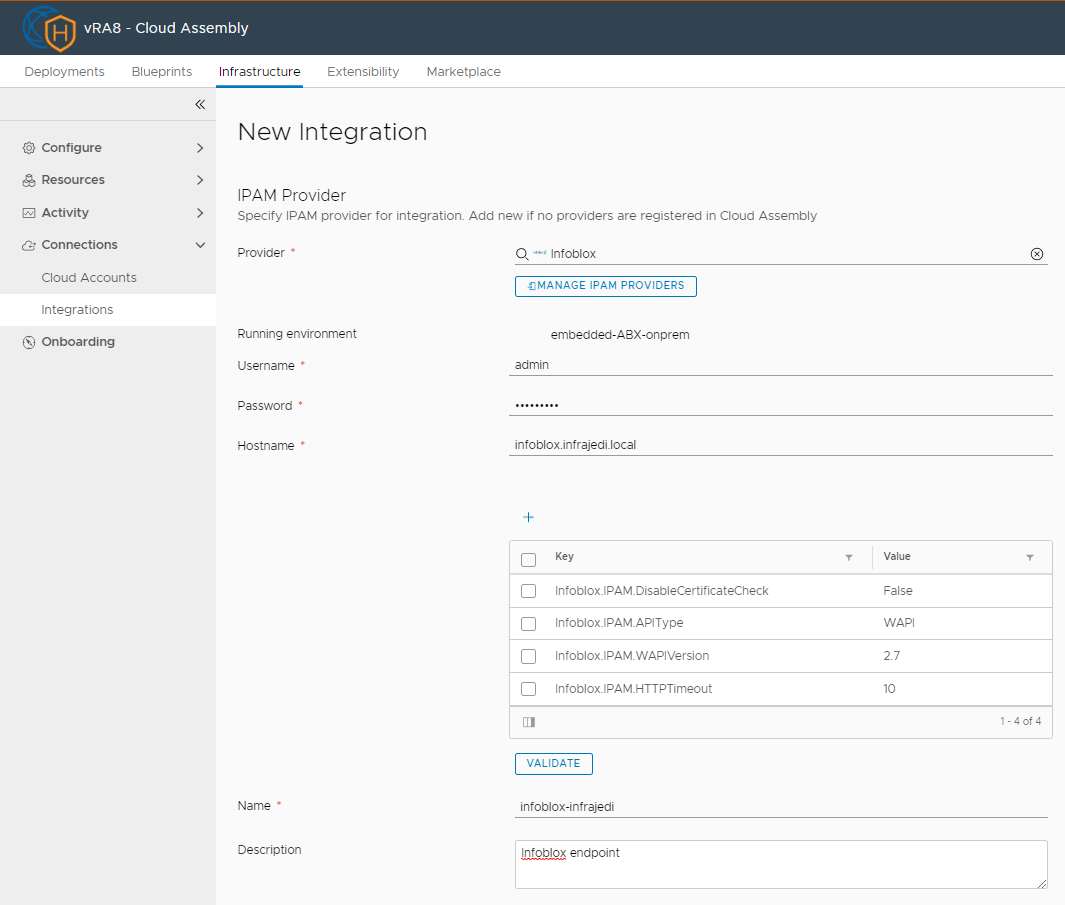
For a production environment you may want to increase the HTTP Timeout via the “Infoblox.IPAM.HTTPTimeout” setting.
- Click on Validate and finally Add if all is good.
Setup a Network Profile to use Infoblox for IP allocation
In this step we will setup the network and Network Profiles.
To deploy your blueprint in a specific network, we can make use of tags within vRA. You can either tag the Network or the Network profile with something you can use in your blueprint. In this post I will tag both the network and the Network Profile.
Configure the Network
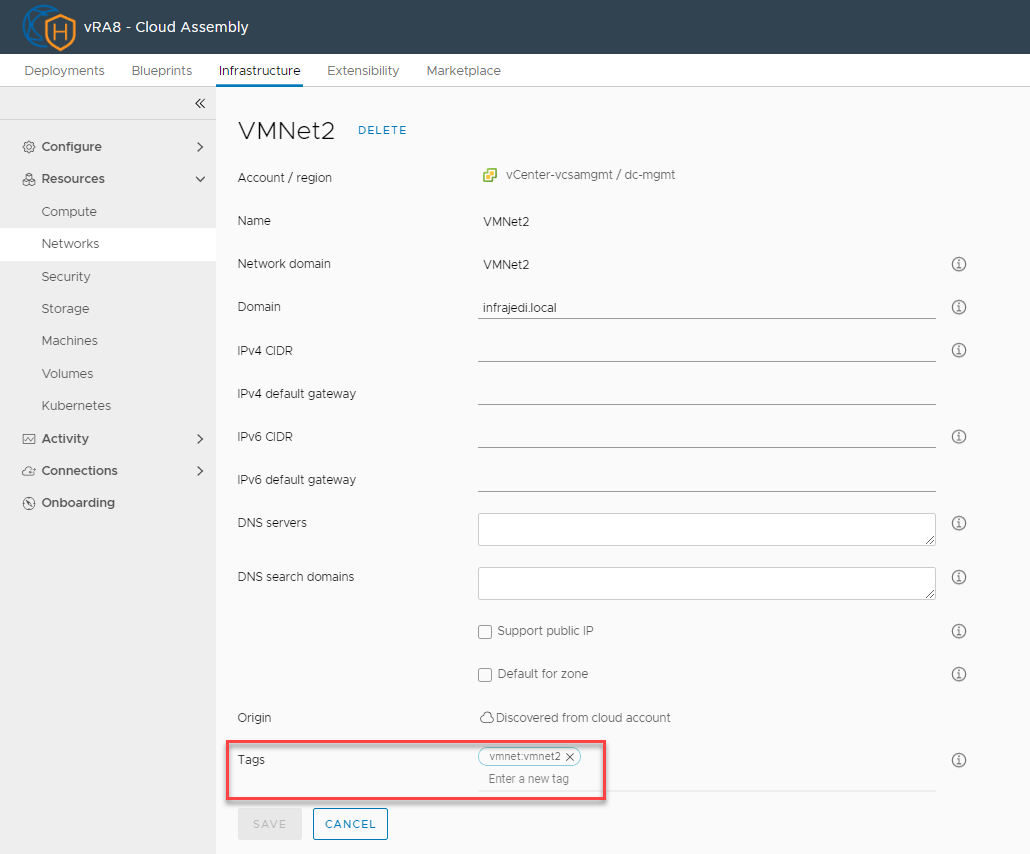
- Go to Resources, Networks, tab Networks
- Find your Portgroups which are discovered through the vCenter Integration.
In this example I will use a standard Portgroup with the name VMNet2 to deploy my vm.
- Add a tag to the network. For example vmnet:vmnet2, leave all other options empty/default.
Configure the Network Profile
- Go to Configure, Network Profiles and Click “New Network Profile”
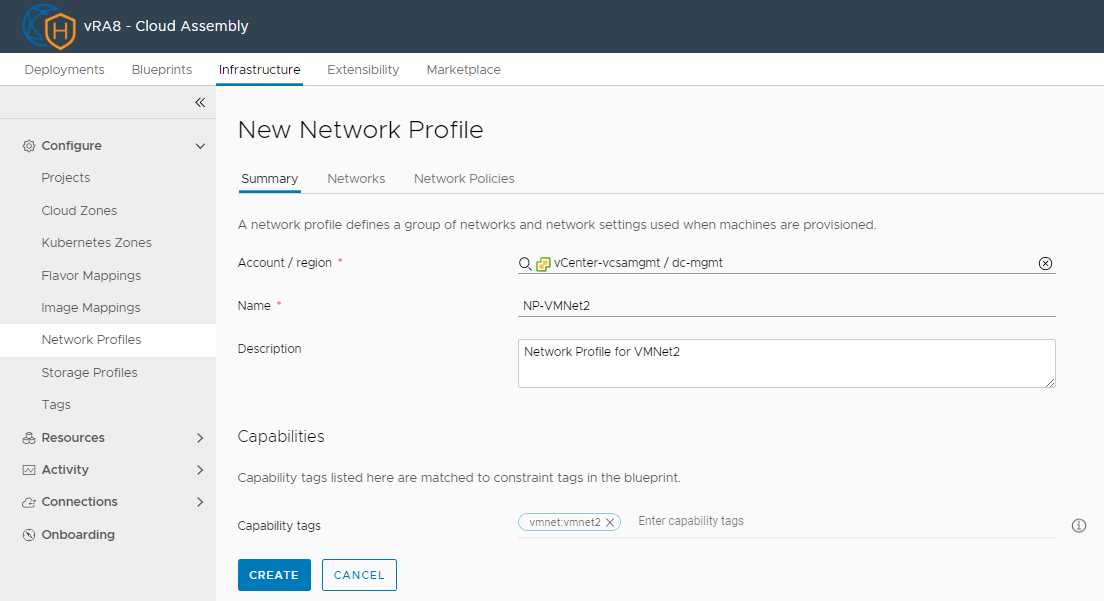
- Select your account/region and enter a name and description for your Network Profile.
- Add the capability tag vmnet:vmnet2 (like we did on the Network)
- Click tab Networks, Add Network and select the VMNet2 Network
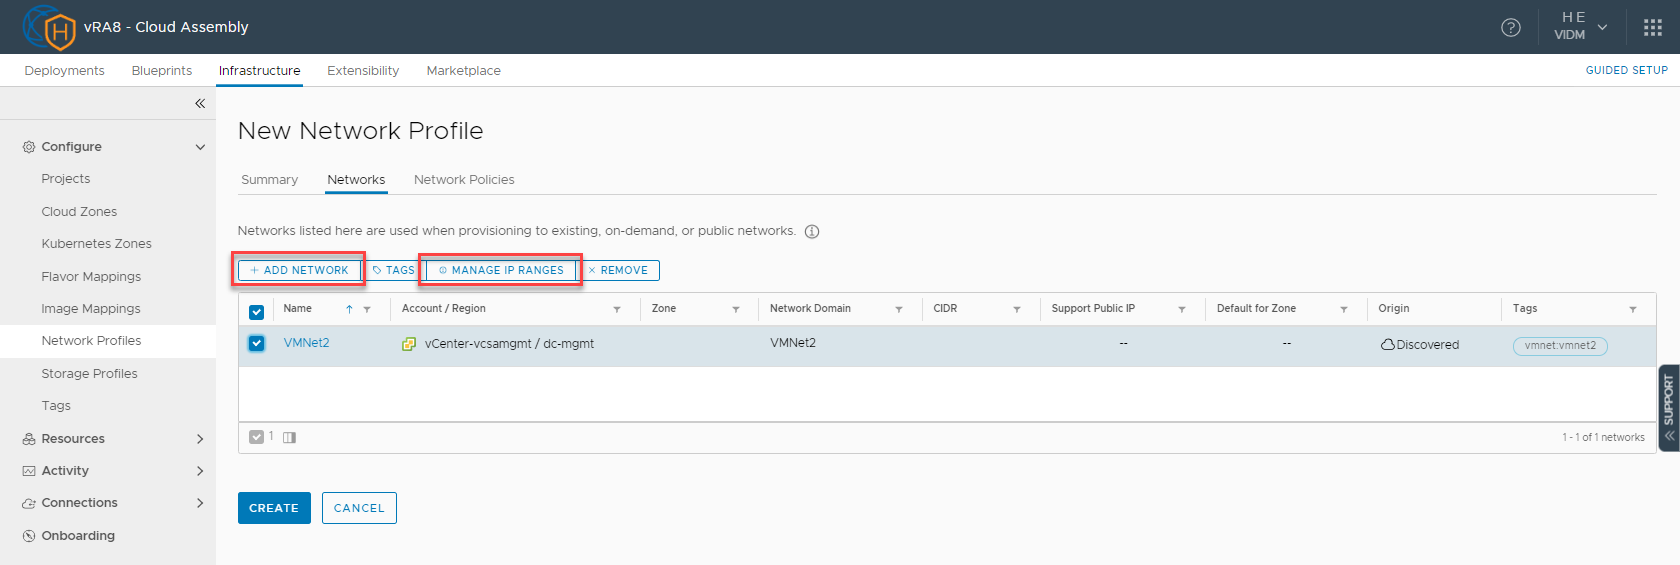
- Once done, Select VMNet2 and Click “Manage IP Ranges”.
- In the Manage IP Ranges window, Click “Add IPAM IP Range”
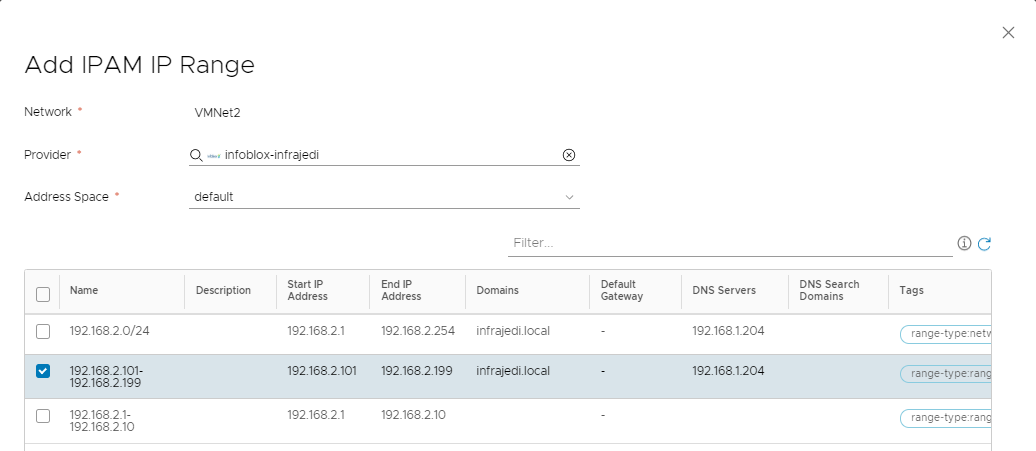
- In the Add IPAM IP Range window Select your Infoblox Provider.
- Select the Infoblox Address Space and the IP Range you have created in Infoblox.
- Click Add to return to the previous screen.
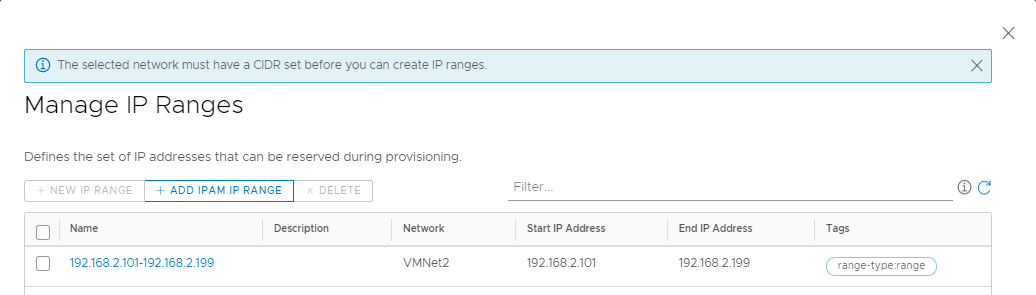
There may be a warning message “The selected network must have a CIDR set before you can create IP ranges”. This message can be ignored since we are using the external Infoblox integration.
- Click Create to finish the creation of the network profile.
Setting up the blueprint.
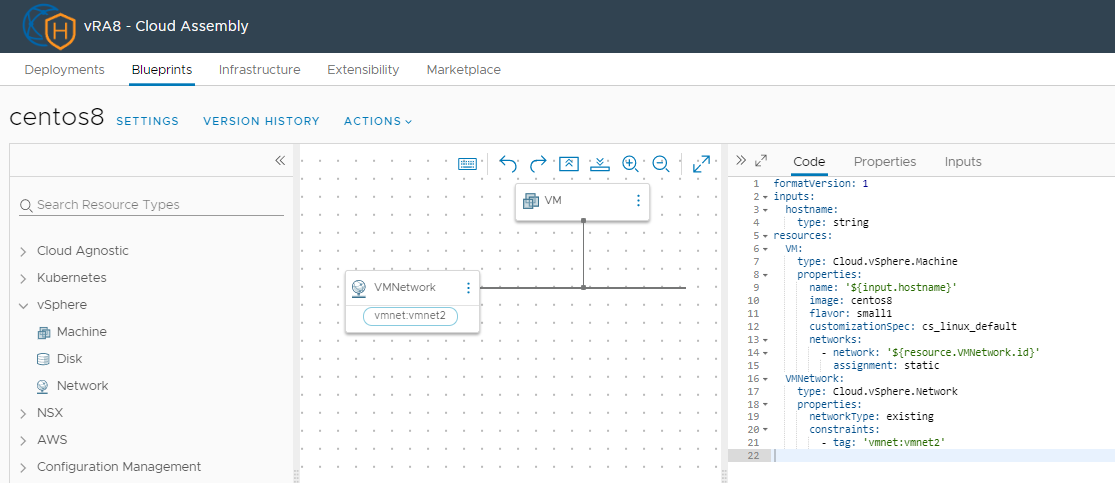
I am using a simple blueprint with CentOS 8 as image in combination with a vCenter customization specification.
formatVersion: 1
inputs:
  hostname:
    type: string
resources:
  VM:
    type: Cloud.vSphere.Machine
    properties:
      name: '${input.hostname}'
      image: centos8
      flavor: small1
      customizationSpec: cs_linux_default
      networks:
        - network: '${resource.VMNetwork.id}'
          assignment: static
  VMNetwork:
    type: Cloud.vSphere.Network
    properties:
      networkType: existing
      constraints:
        - tag: 'vmnet:vmnet2'
I have put a network constraint tag on the blueprint, so only networks/network profiles that are tagged with vmnet:vmnet2 will be used for deployment (which has the Infoblox IP Range attached).
Some notes on the vm and hostname:
On the blueprint, I have an input field called hostname. This input field will be used to set the vm name and hostname.
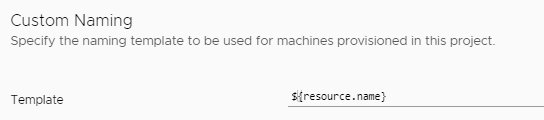
For the vm name, I have setup Custom Naming on the Project that uses ${resource.name} as template.
The customization specification is configured so it uses the vm name as hostname.
Some notes on the infoblox “dnssuffix”. You have to specifically define the domain name in the DHCP scope. Inherit settings on the DHCP scope will NOT work. There are also environments where the same network is used to deploy vm’s for multiple Active Directory domains. In this case you have to make use of an infoblox property: Infoblox.IPAM.Network.dnssuffix. This entry must be inserted under the Cloud.(vSphere.)Machine properties in your blueprint. In the above example this would be at the same level as image and flavor.
After everything is setup, it is finally time to deploy our blueprint.
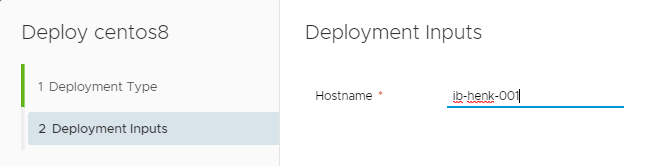
- Open your blueprint and Click Deploy. You will be asked to enter the Hostname.
If you have installed the latest vRA 8.0.1 Hotfix 2 [link] you can also check the Provisioning Diagram to see if your tags and selections work.
The deployment should not take much time.
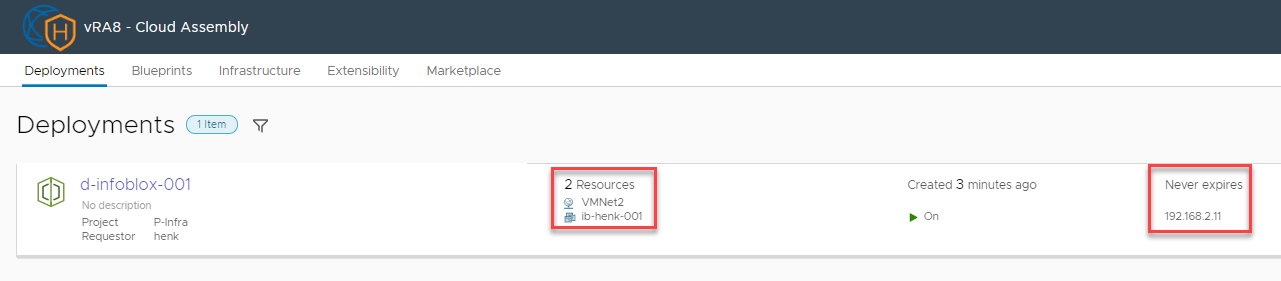
Take a look at the VM name and the IP Address on the deployment:
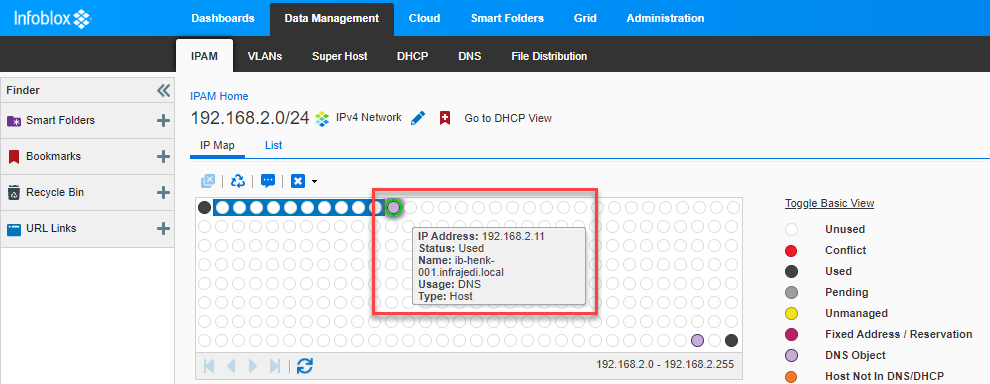
Compare this to what you see in Infoblox:
And finally let’s check the guest OS itself:
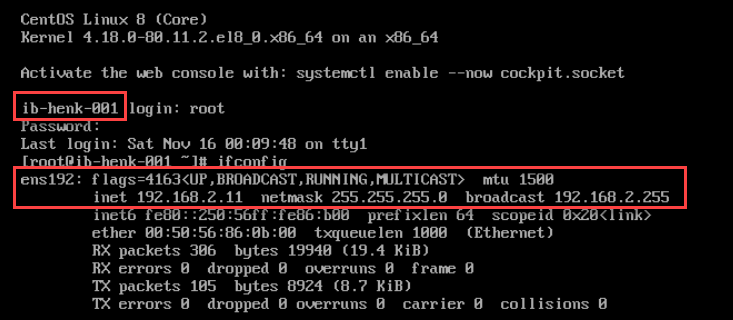
All there! Happy IP Allocating with vRA and Infoblox.
In a next post we will show how to get this up and running with an Ubuntu blueprint that uses cloud-init.


We are having issues getting the IP to get applied to the VM after this is done. What settings are you using in your customization spec?
In the customization spec I have: “Use standard network settings for the guest operating system, including enabling DHCP on all network interfaces”.
Hank, We don’t have DHCP enabled on the network. We are trying to grab an IP from infoblox and assign it to our VM we are creating. We are trying to create a windows machine. Not sure if that matters. The NIC is not being enabled on the VM after the customization script has run.