Getting started with vRA SaltStack Config – part 2
If you successfully complete part 1, it is now time to see the integration between vRA and SaltStack in action.
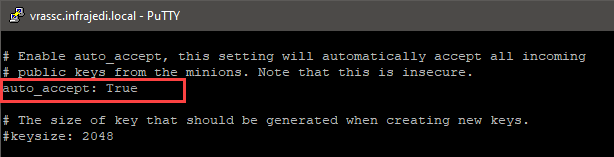
To make life a bit easier (but insecure) you can configure SSC to automatically Accept new Minion Keys. To do this, you have to edit the file /etc/salt/master and look for the auto_accept entry. Remove the bracket and set the value to True
Restart the salt-master service after doing the changes:
systemctl stop salt-master.service
systemctl daemon-reload
systemctl start salt-master.service
Before you start with the full vRA integration testing and deployment, I advise to do a manual Installation of the SaltStack Minion. This will limit the scope for troubleshooting. I deployed a basic Ubuntu 18 VM with vRA, without any integration. See the [Cloud Template] on my github. Some parts are worth mentioning.
- The image I am referring to is the default Ubuntu Cloud image in ova format, which I host on a local webserver;
- Direct download for the lastest version can be found [here]. Visit https://cloud-images.ubuntu.com/ for all available image versions and formats
- The cloudConfig part will add a user as specified by the input and add that to the sudo and admin group;
After the deployment of your Ubuntu VM, login with SSH with the specified username and password.
Run the following commands to download the Saltstack bootstrap script and install the minion. Note the vRA SSC hostname parameter specified after -A:
curl -L https://bootstrap.saltstack.com -o install_salt.sh
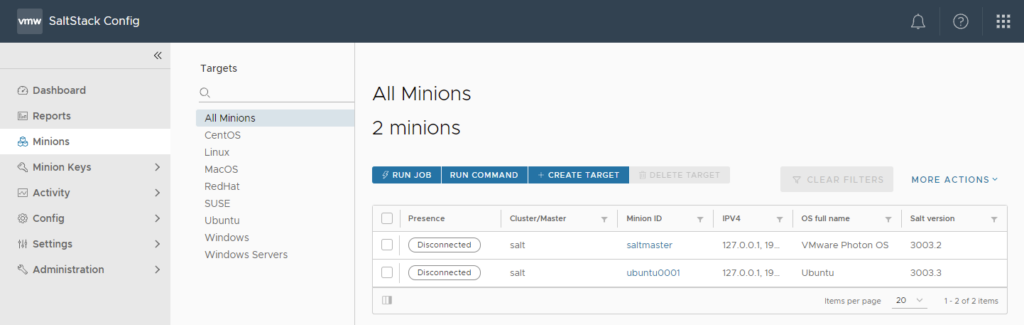
sudo sh install_salt.sh -A vrassc.infrajedi.localIf installation was successful, switch back to the vRA SSC interface and select Minions. You should now see the deployed VM with the minion installed. Note that the presence has status “Disconnected”.
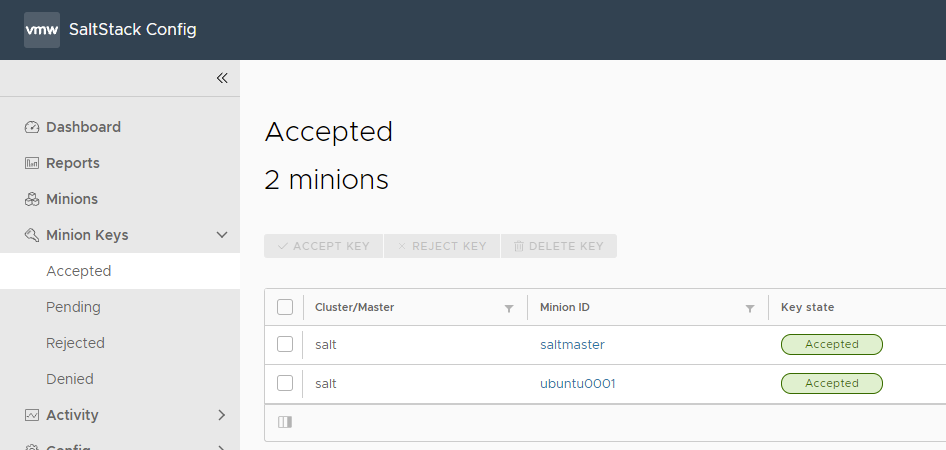
You can also check the Minion Key that got accepted.
If this works, all is set for the final step; integrating vRA with SaltStack Config. Create a new vRA Cloud Template with SaltStack Config integration or edit the previous cloud template and add the following under Properties:
saltConfiguration:
  masterId: saltstack_enterprise_installer
  minionId: '${env.deploymentName}'
  saltEnvironment: sse
  stateFiles:
    - /apache/init.sls
Where;
- MasterId: saltstack_enterprise_installer. This is the default value provided by the installation.
- minionId: can be anything, I used the deploymentname as VM and minion name.
- saltEnvironment: corresponds with the (in this case default) Salt environment.
- stateFiles: configuration files to be applied.
For your convenience, you can find the [Cloud Template] on my github page. The Custom Naming Template I have used is ${resource.name}

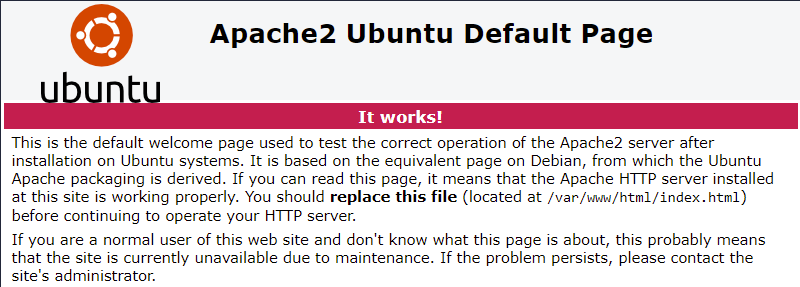
Deploy a VM based on the new Cloud Template. You can check the Tasks in vRA SSC. After successful deployment, in vRA, note the IP Address or hostname from the deployed VM, start a browser and check to see if the default Apache2 Ubuntu Page shows up.
That’s it for this blogpost!
If you are interested in learning more, check out VMware Hands on Lab [HOL-2206-05-CMP] or this training on MyLearn; VMware vRealize Automation SaltStack Config: Deploy & Manage [V8.4].