Upgrade to VMware Identity Manager (VIDM) 3.3.3 with vRealize LifeCycle Manager (vRSLCM)
VMware released VMware Identity Manager (VIDM) 3.3.3 on the 13th of November (yes.. on a friday for superstitious ;)). Note that newer versions of this product are renamed to Workspace One Access. In the VMware Validated Design (VVD) Documentation, VIDM is often referred to as Workspace One Access. This article describes the upgrade of a single VIDM, non-clustered deployment to version 3.3.3 via vRSLCM.
Update; On 3rd of December VMware issued a security update for VIDM 3.3.x which is described in [VMSA-2020-0027.2] and relates to CVE-2020-4006. At the end of this article, I have added my experience.
To start with, I highly recommend to read the release notes, which can be found [here].
The biggest change is the switch from SUSE Linux 11 SP4 to VMware Photon 3.0 as the underlying Guest OS. During the upgrade, the switchover will be done automatically, just like VMware has done with other products previously.
Another change is that during deployment you can choose different T-shirt sizes for VIDM, varying from extra small to extra extra large. If you have deployed vRealize Automation 8 in your environment, then from version 8.2, the only official supported size is Medium; a whopping 8vCPU and 16GB Memory. More info in the upgrade documentation [here].
The final thing I would like to mention is this part in the Known Issues session; “After upgrade from VMware Identity Manager 3.3.2 to 3.3.3, if the embedded connector is being used with Active Directory over IWA, users can log in, but the directory sync will fail until the embedded connector is migrated to a VMware Identity Manager external connector on a Windows server. Workaround. No workaround. You must migrate the directory from the embedded connector to an external VMware Identity Manager connector“.
The pre-check will throw a warning before the upgrade if you have this configuration. Instead of deploying an external Windows connector, the easy alternative is to use Active Directory over LDAPS (unless you have a lot of Active Directories to connect to).
Pre-requirements:
- (Optional) Create a snapshot of your vRSLCM appliance.
- Download and install vRSLCM 8.2 Patch 1. This patch is required to enable VIDM 3.3.3 deployment / upgrade. The installation should be quite easy; See the [Release Notes] and/or my previous [blogpost].
- Create a snapshot of your VIDM appliance(s).
- Download the VIDM 3.3.3 Upgrade Binary from MyVMware.
- For an offline download make sure you download the correct file from MyVMware. You can find it under VMware vRealize Suite, Single Sign-On. Choose the file “VMware Identity Manager offline upgrade package for vRLCM only”.
- Check if the root account does not have an expired password. Your upgrade will fail if they are expired (see below how to check and change). See below on how to change the password.
- See below for instructions.
- Update: Check if you vidm appliance has the vAPP Properties configured. If not, you will run into networking issues after the upgrade (workaround/fix included below).
Upgrade to VIDM 3.3.3
If all pre-requirements are met, you can finally upgrade your VIDM.
- Go to Environment, globalenvironment and Click View Details.
- Click on Upgrade.
- Select the “I took a snapshot ….” option (please make sure you did) and Trigger an Inventory Sync.
- Click Proceed, Click Next.
- The next step determines the configuration of your Connectors.
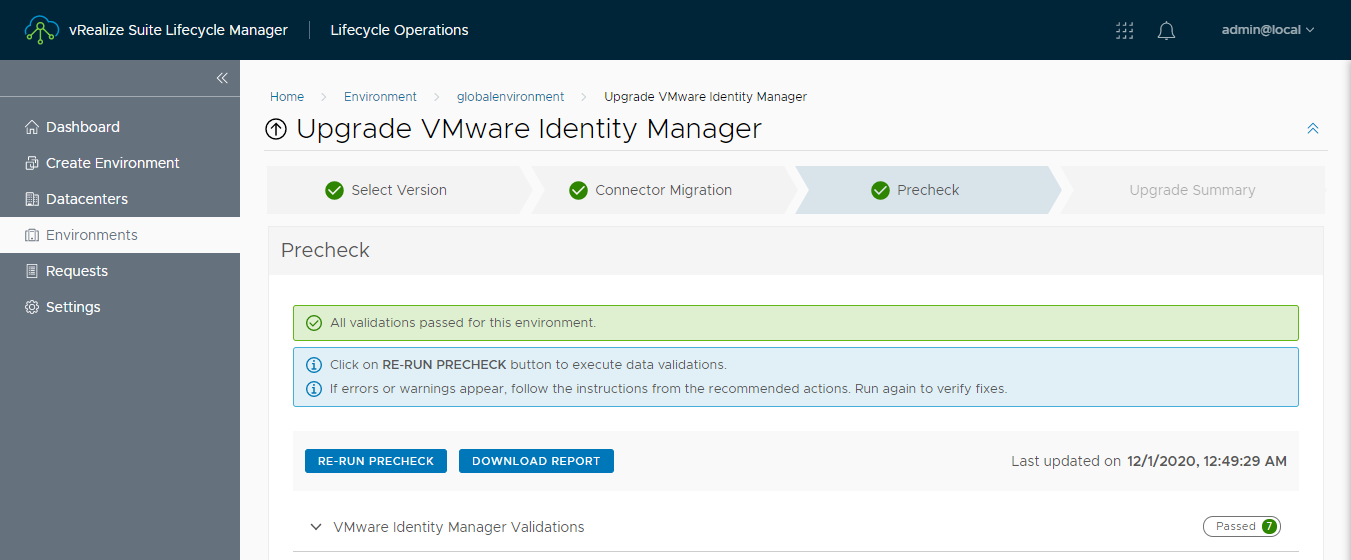
- Click Next to run the Precheck.
- If the Precheck does not return any error, you are good to upgrade.
Note1: Be prepared that the upgrade may fail because the network settings might not be migrated to the new Photon OS. My advice would be to keep the console of the VIDM VM open to see what’s happening.
Note2: When opening the console you may see a warning message like “Error: Deployment Failed, you will need to redeploy. Error log is in /var/log/boot.msg.” This is probably a false positive. See VMware KB59333
- you can follow the upgrade log from an SSH session on the vRSLCM host with the command:
tail -f /var/log/vrlcm/vmware_vrlcm.logIf all goes well your upgrade should finish successfully.
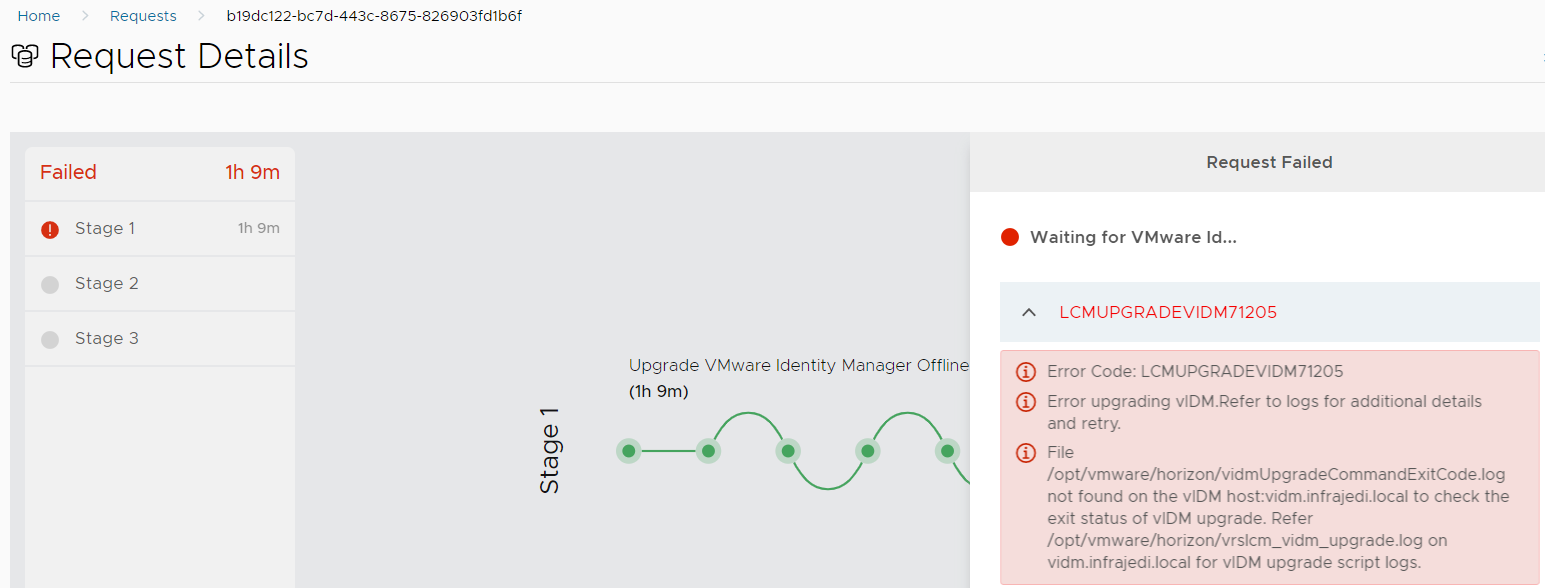
In my case I have seen the vRSLCM Workflow failed at stage 1 with error message “LCMUPGRADEVIDM71205 – Error upgrading VIDM.Refer to logs for additonal details and retry. File /opt/vmware/horizon/vidmUpgrdeCommandExitCode.log not found” , etc.
The first thing I noticed while troubleshooting, was that VIDM was not reachable through SSH. I opened the VM Console to see this unpleasant surprise: “No Networking Detected. Please Login and run the command /opt/vmware/share/vami/vami_config_net to configure the Network“.
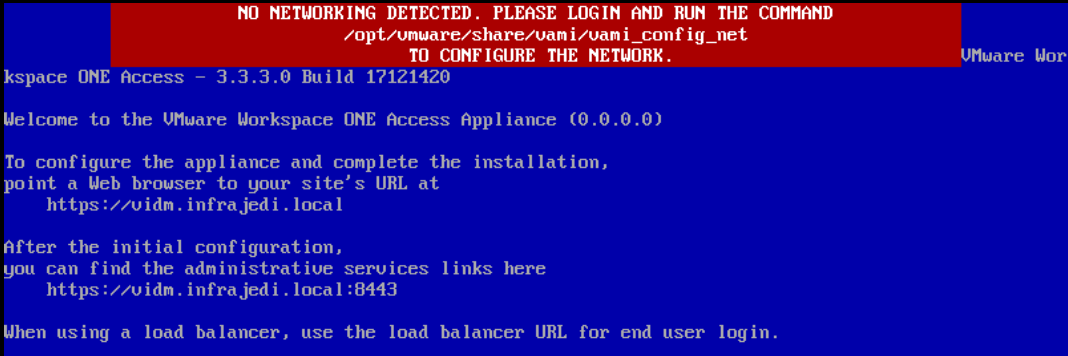
As you can see in the screenshot the SUSE OS is replaced by Photon and VIDM (or I should say Workspace One Access) was upgraded to 3.3.3.
I logged in to the Console and ran the vami_config_net command. However, the settings where not saved and I ended up manually configuring the network configuration file like this
root@vidm [ ~ ]# cat /etc/systemd/network/10-eth0.network
[Match]
Name=eth0

[Network]
Domains=infrajedi.local
Gateway=192.168.1.1
Address=192.168.1.214/24
DNS=192.168.1.204
DHCP=no

[DHCP]
UseDNS=false- After changing the network config file, restart the networkd and resolved services:
systemctl restart systemd-networkd
systemctl restart systemd-resolved- Check if you can access the VIDM appliance via the network.
- Reboot the complete VIDM VM.
- After the VIDM comes back up, Click Retry in vRSLCM on the previously failed Request.
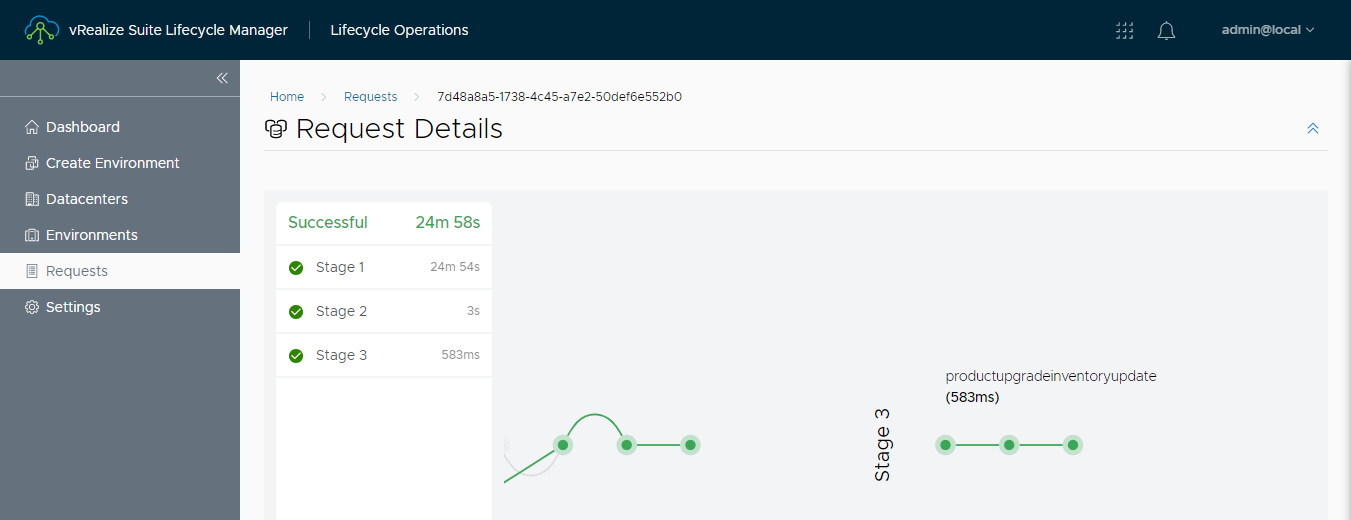
This should finish the Request successfully. The next step I tried, was logging in to my (multi-tenant) vRA deployment, which also did not return any errors. So from the looks of it, everything is fine, but if you are in doubt and/or run into other issues, I advice to create an SR with VMware Support.
You can find an additional source for troubleshooting Upgrade Errors here.
Installation of VIDM 3.3.3 Hotfix
VMware released a patch for various VIDM and WS One Access versions to mitigate against CVE-2020-4006. The patch has it’s own KB article [81754]. I will describe my experience with the 3.3.3 version since this is what I’m running now. For other versions another approach may be required.
- Download the VIDM 3.3.3 patch from [myVmware]
- Create a snapshot of your VIDM system.
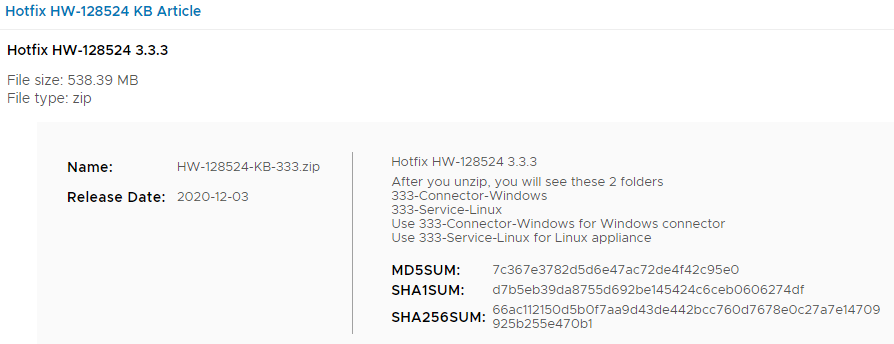
- Copy the VIDM333__HW-128524-KB-333.zip hotfix to your VIDM system.
- Login with the root account.
- Backup the directories as described in the KB Article
- cp -r /opt/vmware/horizon/workspace/webapps/cfg .
- cp -r /opt/vmware/horizon/workspace/webapps/hc .
- Unzip VIDM333__HW-128524-KB-333.zip
- Change to the 333-Service-Linux directory
- Run the update script:
- ./update.sh
- The script will stop the Horizon Service, replace some .war files and start the Horizon Service. (That is also the only output you get).
- To validate the patch is successfully applied you can launch the configurator Login page https://<vidmhostname>:8443/cfg/login” and check the “Build” version. It should be “17267230”.
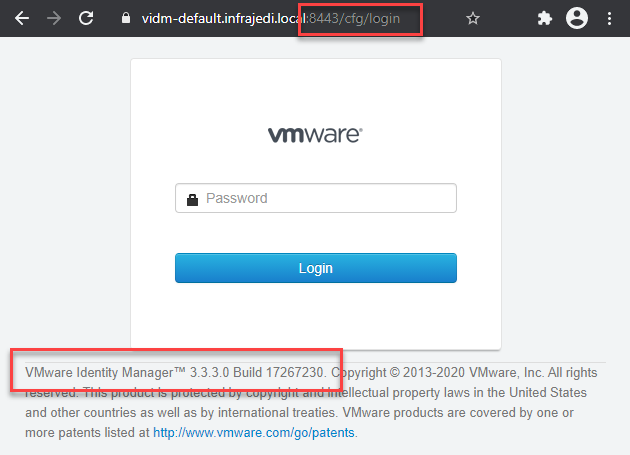
- Note that the Version number is only reflected here and not on the management interface (3.3.3.0 Build 17121420 there)
Check and change the VIDM root and sshuser Account Passwords
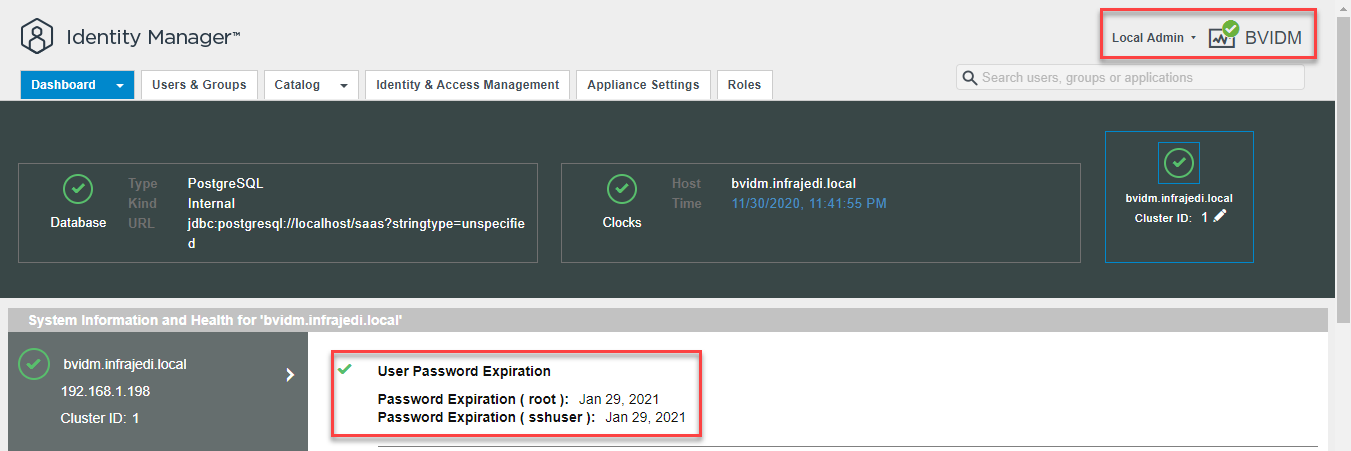
To prevent a failed upgrade of VIDM, check the password expiry of the root account and update if needed. To check the current password settings
- Login to the VIDM web interface and click on the System Diagnostic icon.
- Check the Password Expiration for the root (and sshuser) account.
If they are about to expire, the best way to change this would be via the Locker functionality of vRSLCM.
The first thing to do is to check what passwords are being used in your Environment. For VIDM you can check this by
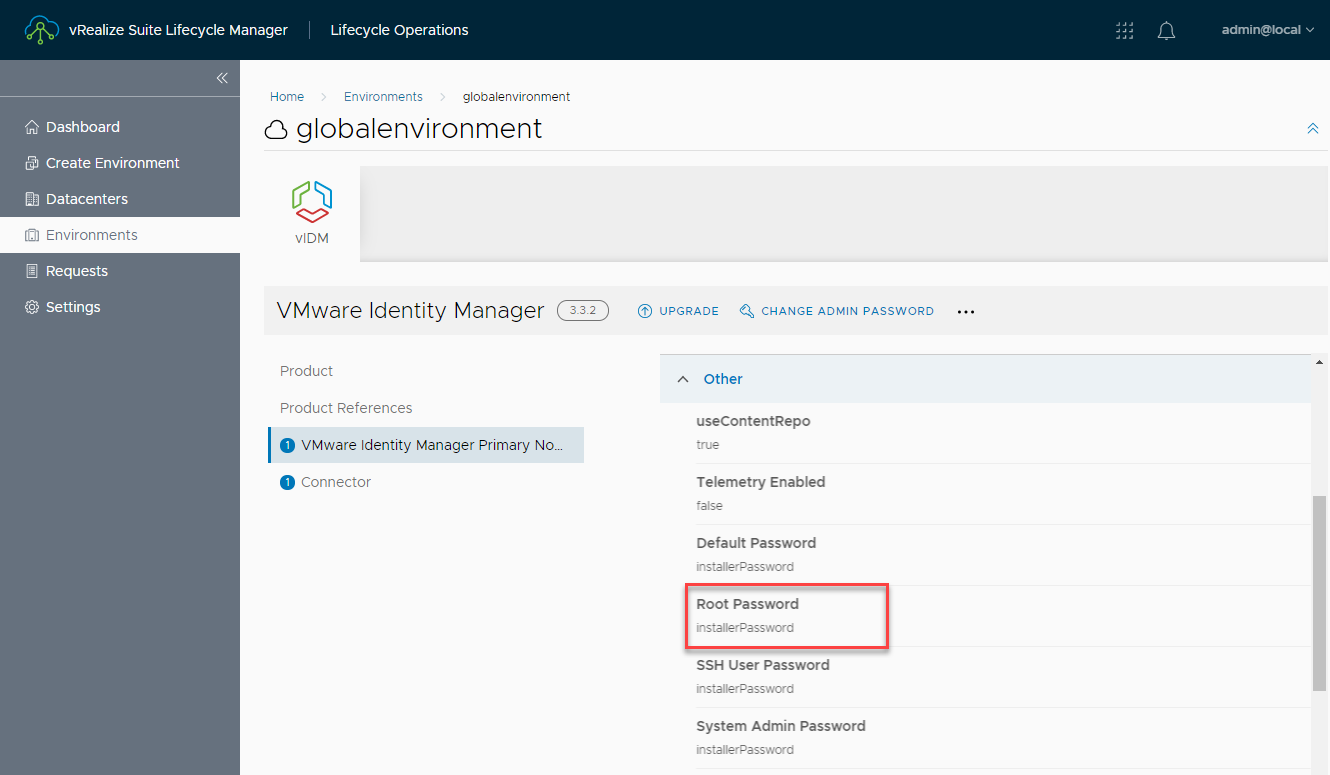
- Select Environments, Global Environment, View Details
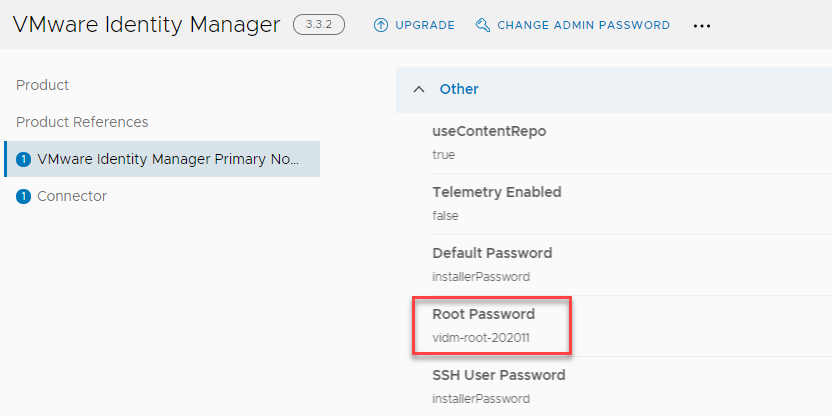
- Select the VIDM Node.
- Right under the heading Other, you should see what Password is currently configured. In the screenshot below you can see that all passwords, including the root Password, are configured as installerPassword.
To change this password, you must first create new password credentials.
- From vRSLCM, go to Locker, Password and Click Add. Enter a Password Alias, User Name, Password and other details. Click Add.

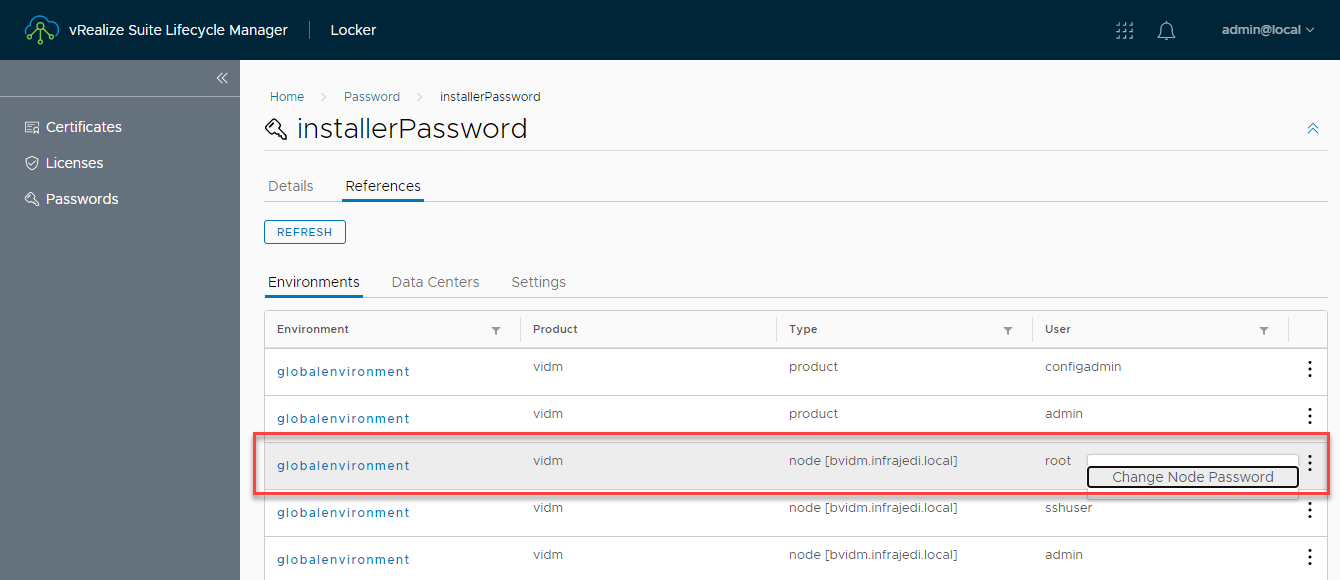
- Go to Locker, Passwords and Click on the Password that is currently configured (installerPassword).
- Select the References tab to see where this password is being used.
- Find the root account for vidm and click on the 3dot icon and select Change Node Password.
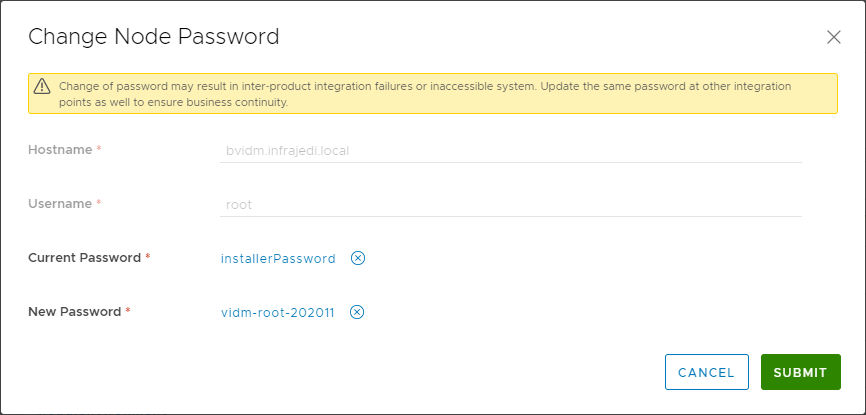
- Enter your Password Details and click Submit and follow the Request.
- When the Request finished successfully, you can again check the Node Details of VIDM and see the the Root Password now uses a different Password (configuration).
Not a best practice, but you may want to change the password age settings with the chage command.
Note that if you set the maximum password higher than 9999, it will be set to “never expires”. VIDM does not seem to like “never expires” and I had some issues during past upgrades.
chage -I -1 -m 0 -M 9999 -E -1 root


1 Response