Configure Compliance Monitoring with vRealize Operations Manager (vROPS)
Introduction
Many organizations have the requirement to comply with relevant laws, policies, and regulations. The fastest way to set this up for your vSphere environment is to use PowerCLI scripts. Configuring these settings is only part of the solution; after that you will have to monitor and report on Compliance.
This is where vROPS comes to the rescue! The option to use vROPS to monitor for compliance has been around for a while. Throughout newer releases of vROPS this functionality got better and easier to use. With the current vROPS 8.1 release, you can choose from built-in compliance Packs for PCI, HIPAA, DISA, ISO, CIS and FISMA and also makes it possible to monitor compliance for vSAN and NSX-T. Do you want to create your own Compliance baseline? No problem! Since vROPS 7.5 you can create your own custom compliance templates.
By enabling a Compliance Pack, your vSphere environment will be compared against the settings defined in the compliance pack and generate alerts when configurations for ESXi, VM’s, Distributed Switches and Portgroups are not in compliance. The Compliance Packs also come with a Report that can be used to schedule and send out Reports.
There are several ways to check compliance for your environment with vROPS; for example, you can create a custom group and apply a specific compliance policy on that. However, what most people start with, is to enable the required Compliance Baseline so it gets activated in the default vROPS policy and see what happens. If you have done all the pre work you should have zero Alerts, but what usually happens is that a ton of Alerts are being raised, especially regarding Virtual Machine Advanced Settings. As of vSphere 6.x (6.5 U1 / 6.0P05 / 5.5U3P11), the platform has been made secure by default by setting the VM.disable-unexposed-features.* to be “Secure By Default” [link], but there are still lots of settings to look after.
However sometimes there are objects that you want to exclude from the compliance check. In this blogpost I want to show how to setup Compliance Monitoring and Reporting with vROPS and how to exclude objects. For this example, I will use the DISA Compliance. (If you have to comply to DISA, you may want to check out this fling: https://flings.vmware.com/dod-security-technical-implementation-guide-stig-esxi-vib).
There are 2 strategies I will describe, each with their pros and cons.
- Apply Compliance Baseline in the Default Policy (on all objects) and add an exception Group.
- Apply Compliance Baseline only to specific objects.
Using vCenter Tags to create vROPS custom Groups.
To include or exclude objects from the DISA Policy, I make use of Custom Group in vROPS based on vSphere Tags. I am choosing Tags here since that seems the most flexible option, but you can also create Custom Groups by VM Folders for example.
Create a vSphere Tag Category named “Compliance”.
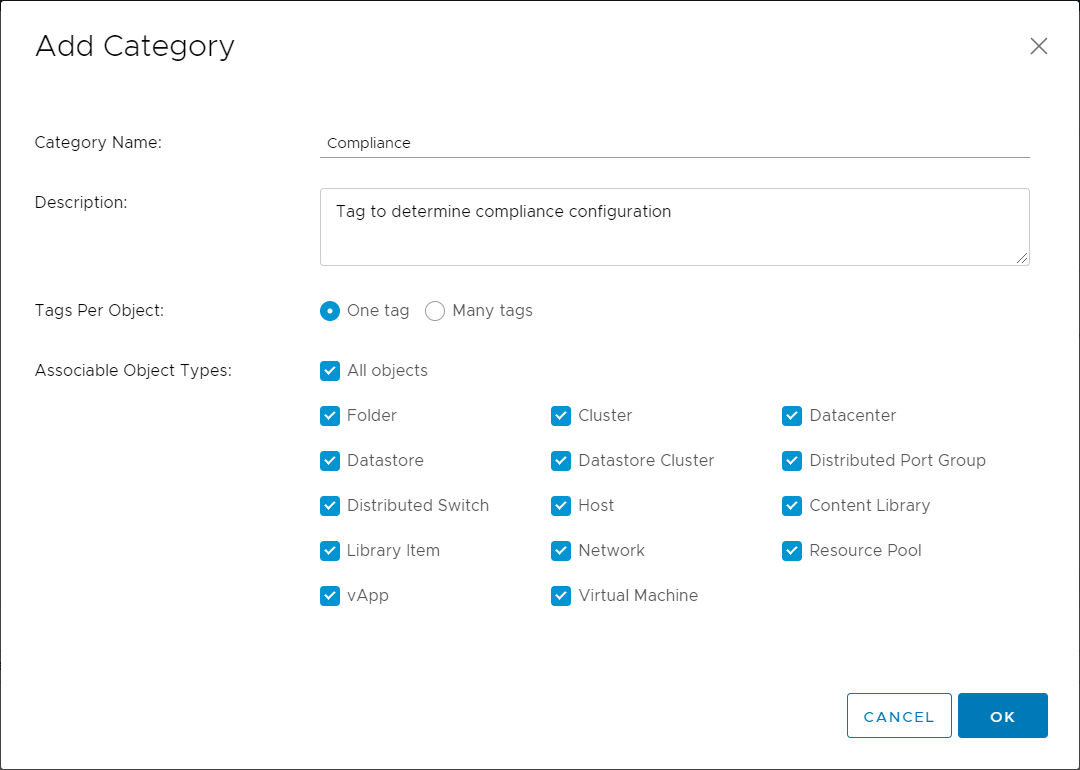
Create tags for you Compliance benchmark like DISA, CIS, HIPAA and also create a “NoCompliance” tag in this Category which we will use to setup the exclusion group in vROPS.
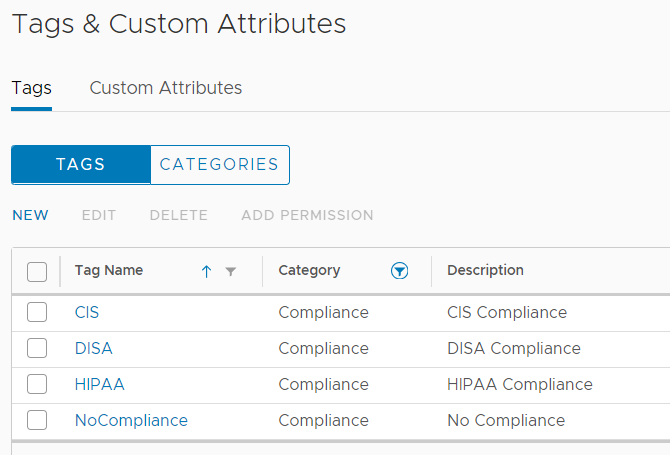
Assign the tags to Virtual Machines and other objects per your requirements.
Activate and enable a Compliance pack in vROPS
Activating and enabling a VMware vRealize Compliance Pack is easy:
- Go to Administration, Solutions -> Repository and Click on Activate on the desired Compliance Pack.

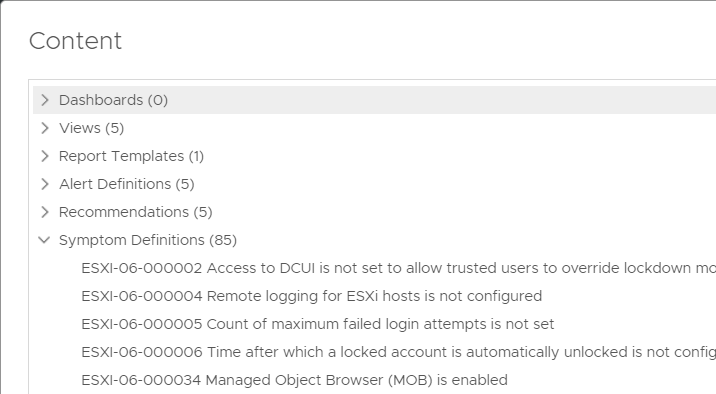
After you have Activated the Compliance Pack, you can Click on the 3 dots icon the see its contents:
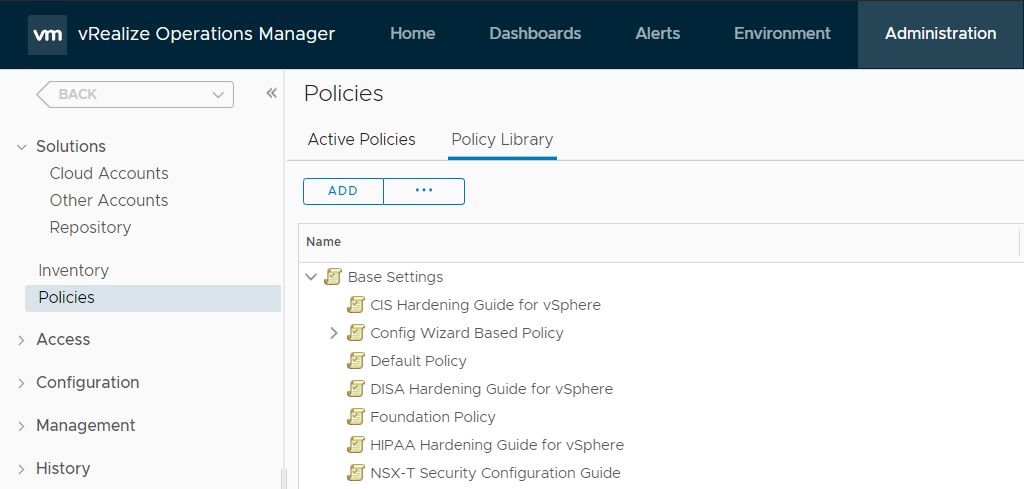
You can check the corresponding Policy in the Policy Library.
The next step is to actually enable the policy. This can be done as follows:
- Go to Home, Troubleshoot, Compliance
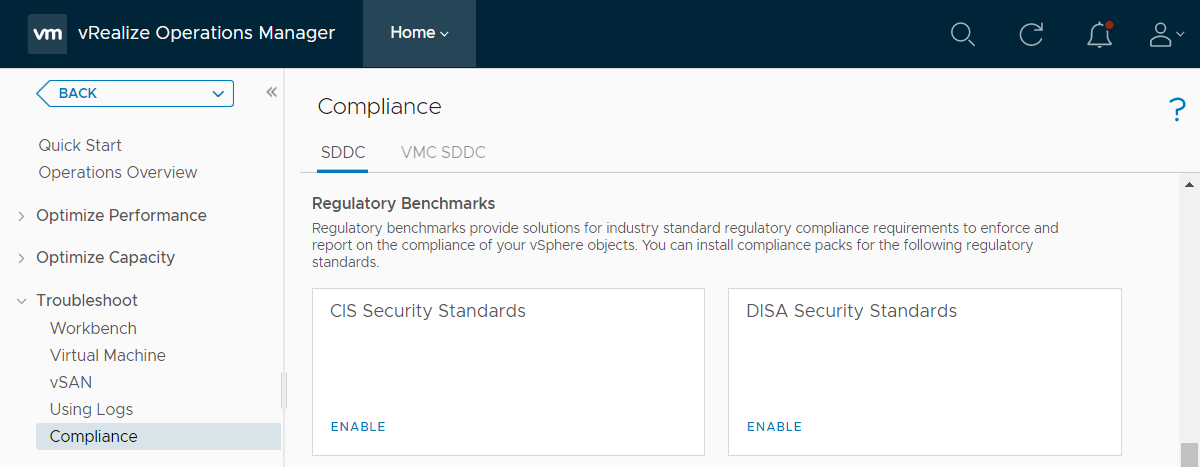
- Select the policy in which you want to enable the DISA compliance monitoring. In my case, I have only one active policy, which is the default vSphere Solution’s Default Policy.

Setting things up like this results in all objects being checked.
The initial assessment will start and may take some time to finish, depending on the size of your environment.
Check for Compliance Status and Alerts
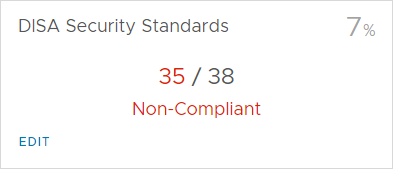
The results of the DISA assessment in my environment returned 35 out of 38 non-compliant findings
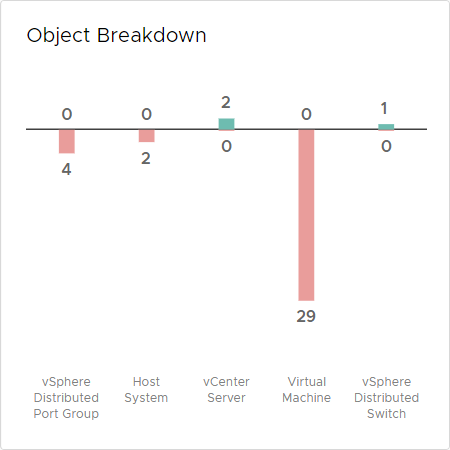
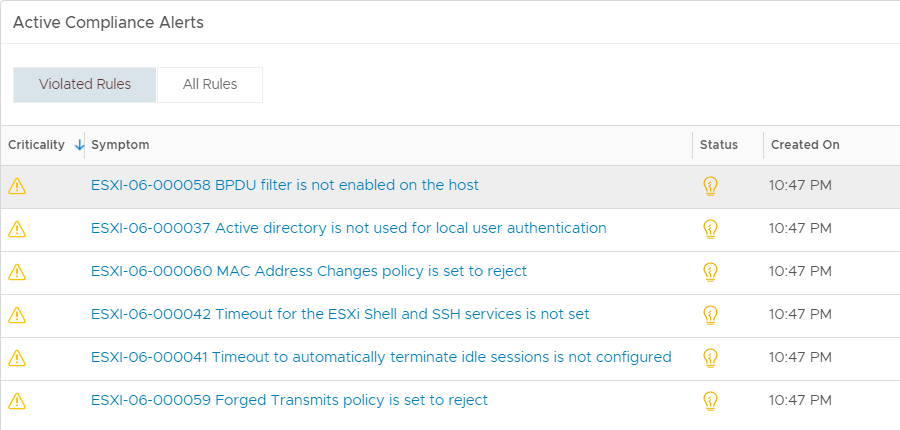
If you Click on Compliance again, or refresh the screen, you get an Object Breakdown overview of objects with non-compliant configurations and an overview with Compliance Alerts.
If you click on one of the Alerts, for example on an ESXi host, you zoom in to the object, to see the Alert Details. In my case I have violated 6 out of 28 rules on my ESXi host:
Obviously, to be compliant you should change these settings on the host.
Resolve Compliance Alerts
This is the point where you may want to use Powershell to mass configure compliance related settings. As always: test this in a pre-production environment first.
For now, let’s have a look what happens if we manually change the settings related to ESXi06-000041 and 000042; the timeout settings for the ESXi Shell and SSH Service. I have changed both corresponding settings to 600 (10 minutes) on the ESXi host. After the next collection, the 2 Compliance violations are gone, but the overall Alert “ESXi Host is violating DISA Hardening Guide for vSphere” is not. This is because there are still 4 rules causing a violation.
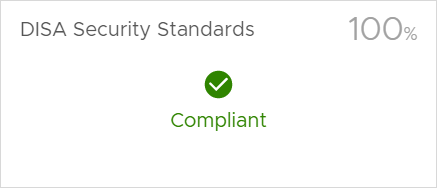
One thing to note are the alerts for MAC Address Changes- and Forged Transmits Policy. This relates to the vSphere Standard Switch settings on the host. After changing all the required settings, the Alert is gone, and the host is 100% compliant:
Excluding objects from Compliance checking
Now to the next part. What if you want to exclude some objects from compliance checking? This may not sound like a good idea, but in reality, there are always exceptions. For these exceptions you don’t want to raise an Alert.
I found the easiest way to exclude objects from compliance checking is to create a Custom Group in vROPS, based on the vSphere Tag “NoCompliance” created earlier and apply an “anti-compliance Policy”.
Create an Anti-Compliance Policy
To exclude objects from compliance cheking, we will create a policy with all the related compliance settings disabled.
- Go to Administration, Policies, Policy Library and click the Add Policy Button
Screen: Add Monitoring Policy
1. Getting Started
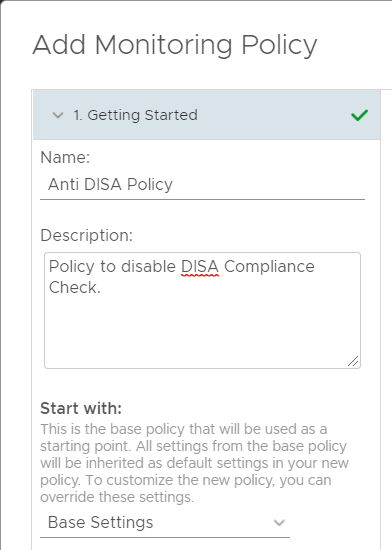
- Name: Anti DISA Policy
- Start with: Base Settings
6. Alert/Symptom Definitions
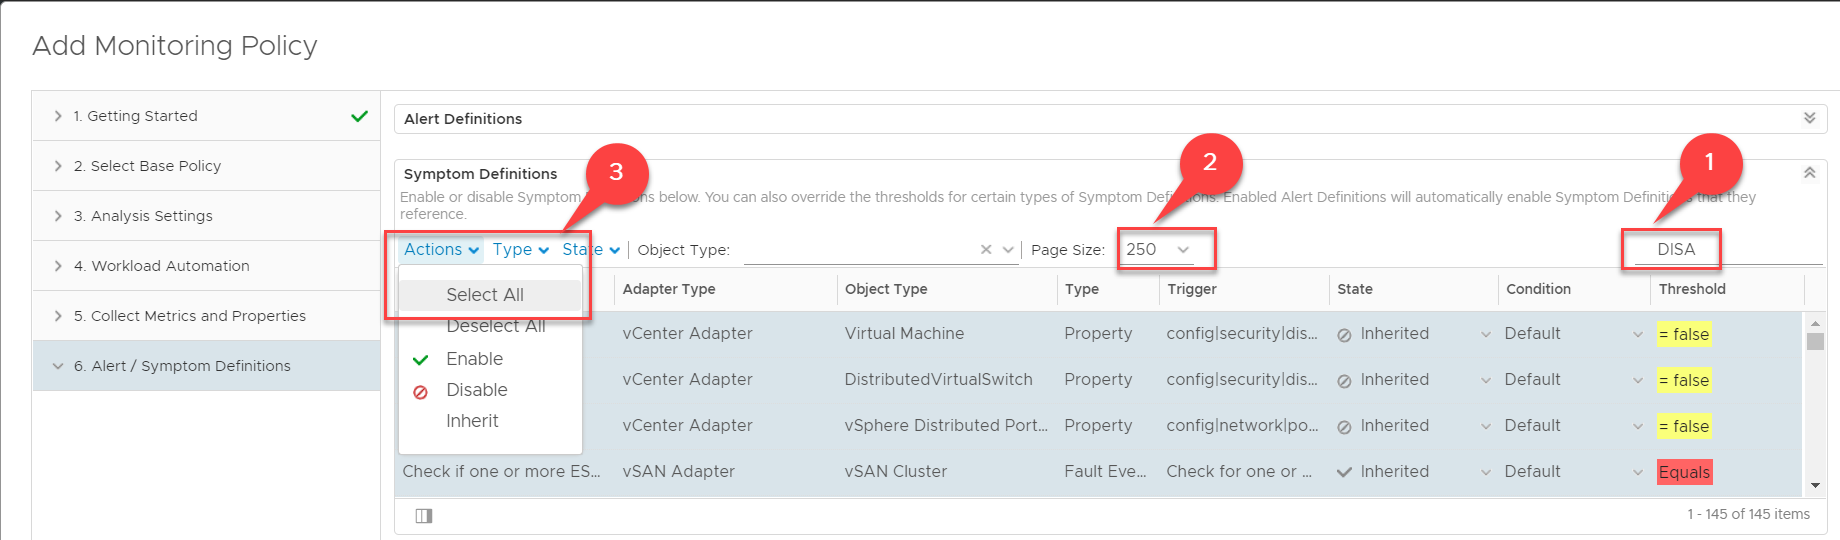
- Give yourself some working space by maximizing the Window and collapse the Alert Definitions.
- Filter on DISA to return all DISA Compliance related symptom definitions.
- Set the Page size large enough to include all definitions.
- Click Actions, Select All.
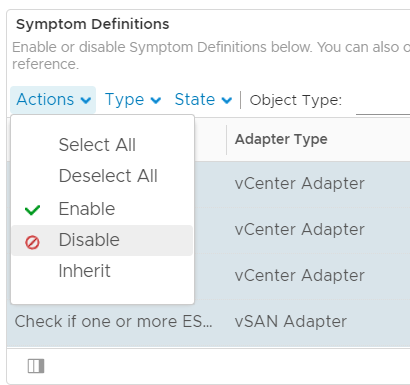
- With all definitions Selected, click Actions again and click Disable.
- Click Save.
Create a Custom Group for Compliance exceptions in vROPS
- Go to Environment, Custom Groups and click Add.
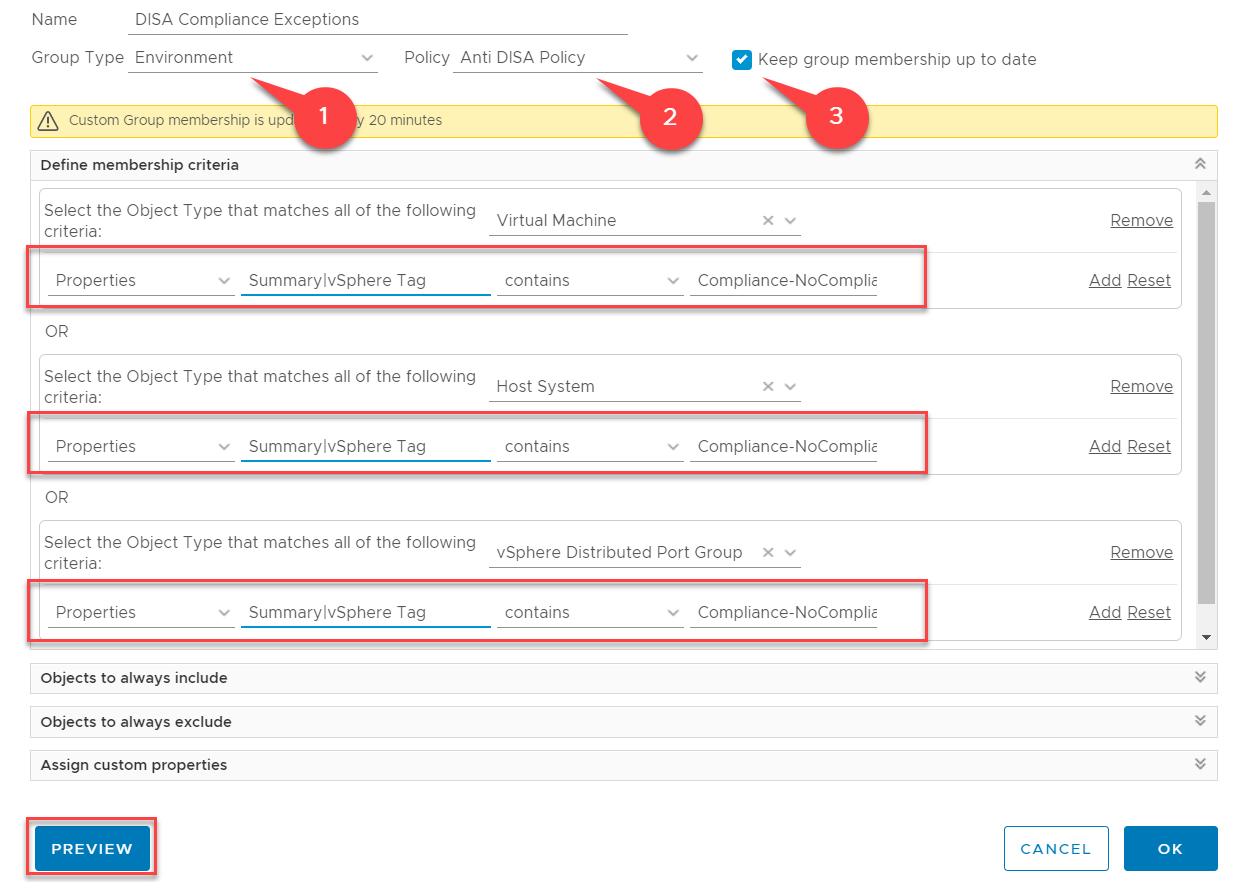
- Name: DISA Compliance Exceptions
- Policy : Anti DISA Policy (which we created in the previous step)
- Select “Keep group membership up to date”
In the above example I have created a Custom Group containing Virtual Machines, Hosts and Distributed Portgroups that have the tag NoCompliance in the Compliance Tag Category.
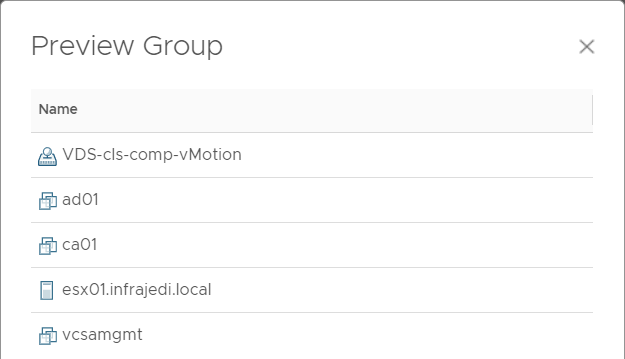
NOTE: Pay close attention to the Notation of the tags. Use “contains” and only enter the Compliance-NoCompliance tag (without Brackets). This is especially of importance if you use multiple tags on objects throughout your environment. To check if you have setup your custom Group correct, use the Preview Button.
Result: DISA Compliance Alerts for objects in the Custom Group will now be inactive.
Small note: within the Compliance Overview screen the excluded objects are counted as Compliant.
Apply Compliance Policy to specific Objects
An alternative method to setup compliance is by applying the Compliance Policy only to a Custom Group based on the vSphere tags we created earlier. To do this, create a Custom Group like before, but apply the DISA Hardening Guide (Policy) instead of the Anti DISA policy.

After that, you can enable Compliance like this:
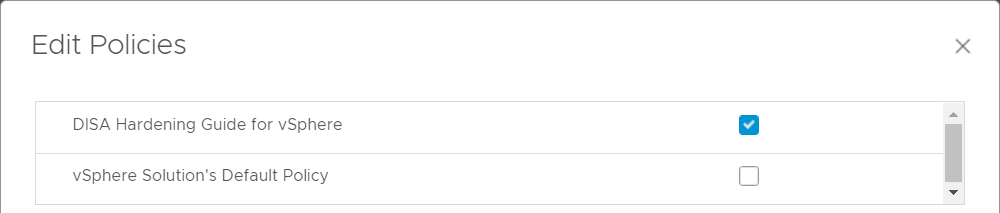
- Go to Home, Troubleshoot, Compliance and Click on Enable.
- Select the DISA Hardening Guide for vSphere.
The advantage of this approach is that within the Compliance Overview screen only included objects are counted.
The disadvantage of this approach is that objects that have no tag do not have any Compliance checking.
vSphere Security Compliance Dashboard
To get an overview of Compliance, you can make use of the out-of-the box vSphere Security Compliance Dashboard.
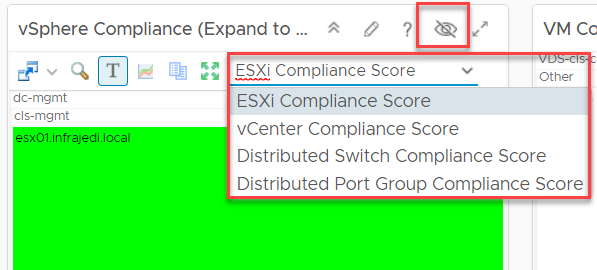
At first I overlooked to options at the vSphere Compliance Widget and did not see compliance for vCenter, Distributed Switch and Distributed Portgroup.
A simple Click on the Toolbar Icon however reveals these options as you can see in the screenshot below.
Setup a DISA Compliance Report
To round things off, you may want to Generate a Report and/or setup a reporting schedule to send out to your SOC Team.
- Go to Dashboards, Reports and filter for DISA
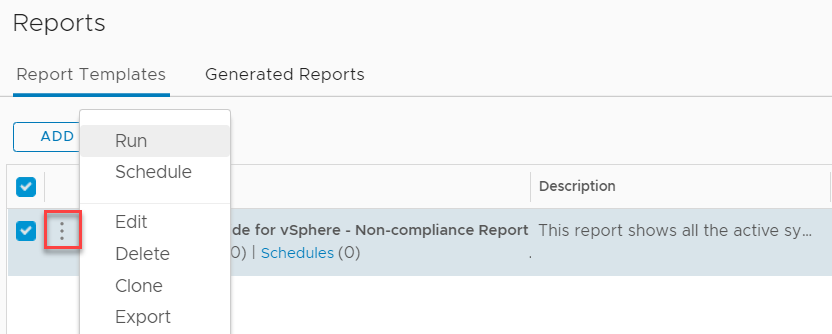
- Click on the 3dots Icon and select Run
- Choose vCenter Adapter, vSphere World, vSphere World (or a specific vCenter).
- Click OK.
For Scheduled Reports the configuration is the same, but you have to option to email the Report or save the report to a Network location.
Good luck and have fun!


Great article Henk!