VIA – VMware Imaging Appliance
Many customers need and use tooling for imaging their ESXi-servers. Some of them are very old and some newer but unable to image their servers using the latest ESXi builds. Not many know that the VMware Cloud Foundation Suite is incorporating an Imaging Appliance (VIA). This appliance started it’s life during the EVO:Rail and EVO:Rack era at VMware. With this post I will explain how to use this hidden gem and what the requirements/limitations are for using it.
Requirements
VIA is part of VMware Cloud Foundation’s Cloudbuilder download. Using VIA successfully has the following requirements:
- VCF entitlement in the VMware License Portal and having VMware Cloudbuilder available for download
- Free management VLAN without DHCP-servers
- Cloudbuilder-VM and ESXi-hosts connected to the management VLAN
- A supported Physical Server Platform (Dell/HPE). Virtual/Nested VM’s are not support (but there is a trick, see below).
- IP-address for the Cloudbuilder-VM
- Lists of MAC-addresses and corresponding IP-addresses of the host-NIC’s that will need to boot from PXE
- PXE Boot is configured as primary boot option
- Install device is configured as the second boot option
- Legacy boot mode configured in BIOS (UEFI boot mode is not supported)
- Servers are in the same L2 domain as the Cloud Builder VM
- Servers are reachable over an untagged VLAN/Network (VLAN ID 0)
Installation & Configuration
Installation of the Cloudbuilder OVA is straightforward requiring only a management IP-address and admin/root-account information. First, you have to make changes to the imaging-service configuration. For this, access the console of the server and login with root. Change the via.properties config-file entries to the ranges used in your management network:
# vi /opt/vmware/evorack-imaging/config/via.properties

via.dhcp.netmask=255.255.255.0
via.dhcp.subnet=192.168.1.0
via.dhcp.routers=192.168.1.1
via.esxi.firewall.allowed.network=192.168.1.0/24
Save the changes and issue a restart of the imaging-service:
# /opt/vmware/evorack-imaging/imaging-service.sh restart
Stopping VIA service
Killing Process matching String start-imaging-services.sh and PID 749
Stopping via imaging services
Starting VIA service
Starting via imaging services
# /opt/vmware/evorack-imaging/imaging-service.sh status
Check status of via imaging services
Service evorack-imaging-esxi-service is running at port 8081
Service via running at port 8445
After the appliance has booted you can access the VIA-GUI by entering:
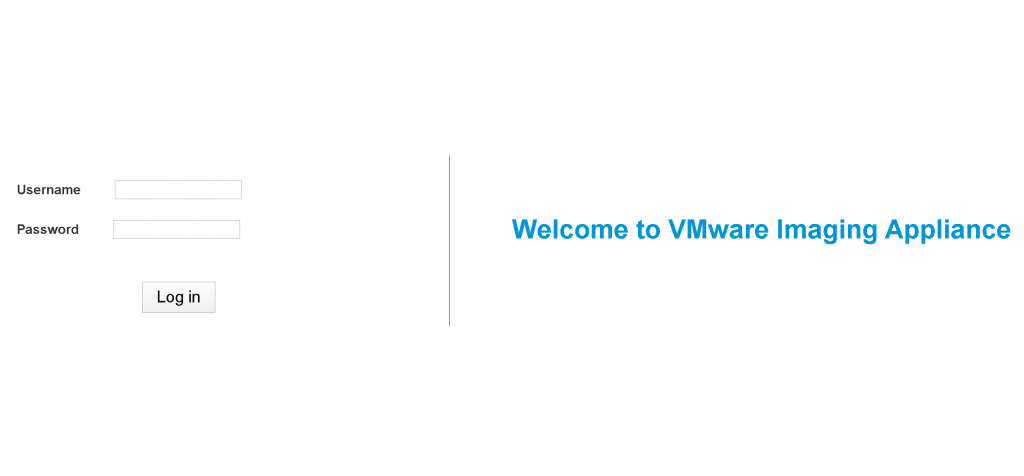
https://<ipaddress>:8445/via/imaging.htmlLogin to the GUI with the admin-account information provided during OVF-deployment and have a look around to get familiar with the interface.
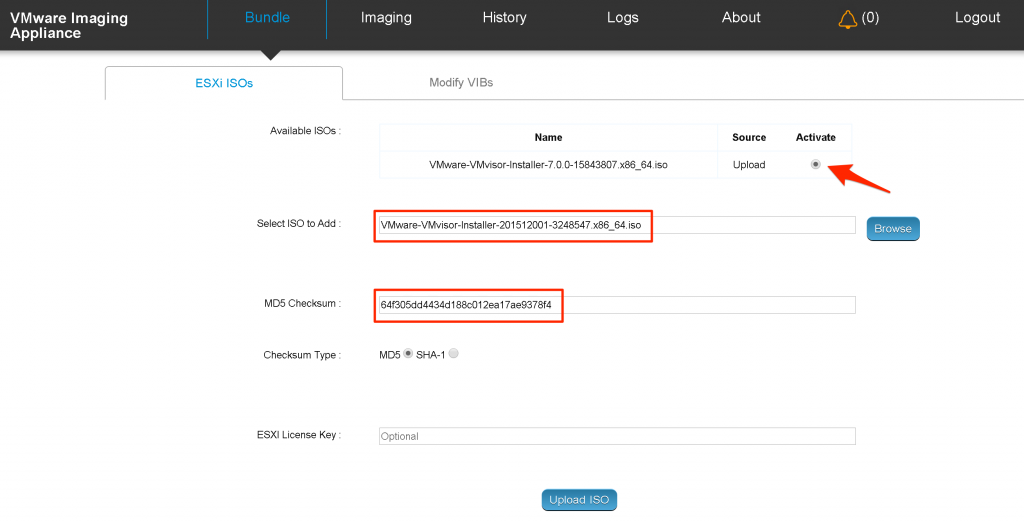
As a first step you need to upload an ESXi-image-ISO and activate it for image deployment. Below is an example of this process.
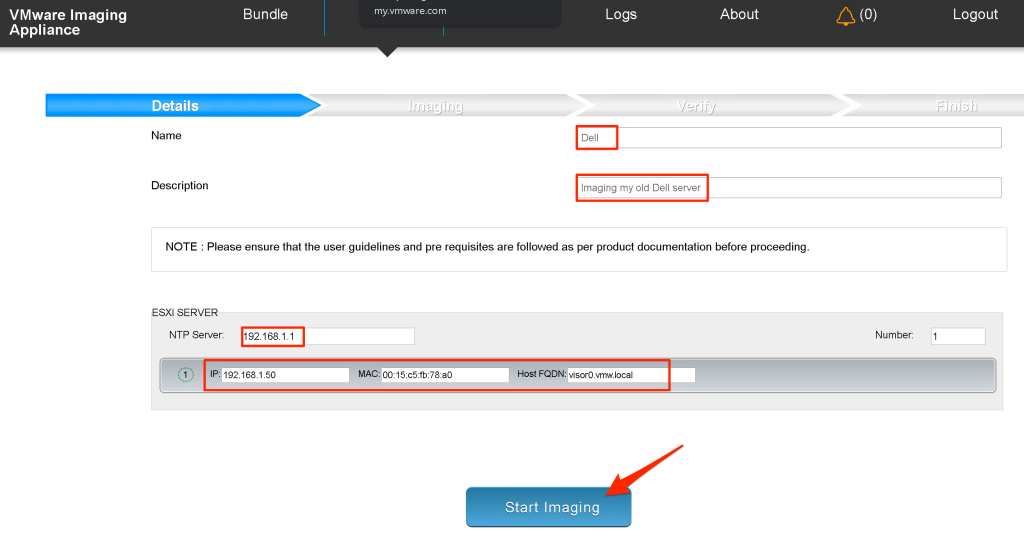
Next step would be to create an imaging-project. For this you need a list of all MAC-addresses from the host-NIC’s connected to the management network together with the corresponding IP-addresses and fqdn’s you would like to assign to those hosts. Additionally this page also requires you to enter the NTP-server address. Below is an example of a single host deployment.
Once we start imaging there is not a whole lot of feedback from within the GUI, but at least we see there is an imaging-task running. We can zoom into the imaging-job by clicking on it.

In the background a lot more is happening as can be seen from the logging. Some excerpts from the log-file for you to understand we are actually connecting and deploying:
/var/log/vmware/vcf/evorack-imaging/via.log
Starting new Imaging!
Bootfile of the ISO image - CustomIso/VMware,_Inc./VMware-VMvisor
Starting imaging activity
Starting DHCP Server:0.0.0.0:67
Using Broadcast IP Address 192.168.1.255
Received a DHCP Request decodeFullPacket: Client Mac =
Finished decoding option values : {CLIENT_ARCHITECTURE=0, DHCP_PARAM_LIST
The TFTP server to be used for this ESXi installation is 192.168.1.235
Found mac 00:15:c5:fb:78:a0 matching Image-By-Mac device 192.168.1.50
Individual Imaging of Device with IP 192.168.1.50
Calling allocateIP for DHCP Offer packet to assign from IP Range 192.168.1.50
Populating boot properties for the response
Replacing DHCP option BOOT_FILENAME property
Informing a new device type ESXI_SERVER, ip 192.168.1.50 to the imaging service http://192.168.1.235:8081 to proceed further
Found 1 Power Cycle Notification(s)
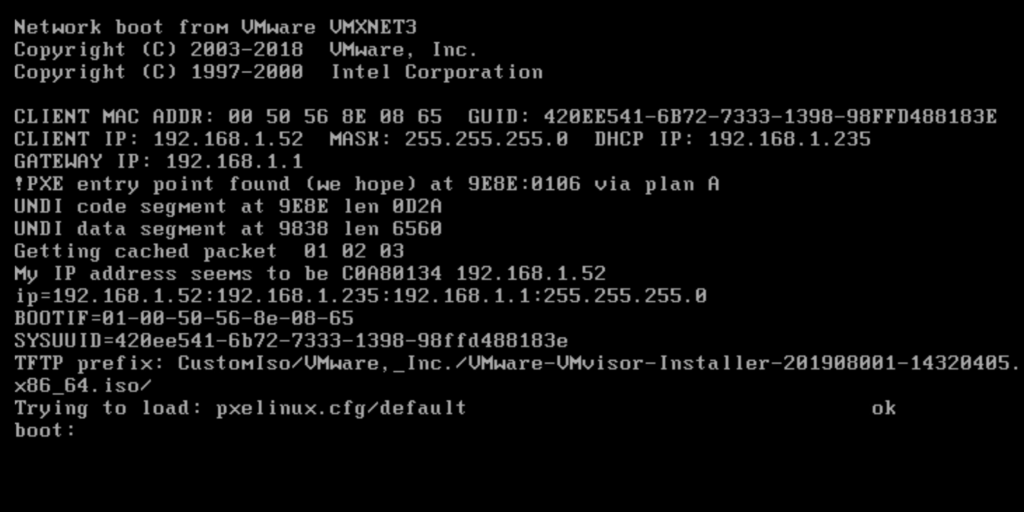
Finished handling a DHCP Request!Once you have seen these messages in the log-file we know the server has successfully (PXE) booted from the assigned BOOTFILE. On the console of the target ESXi-server you should also see this process and shortly thereafter ESXi install loading.
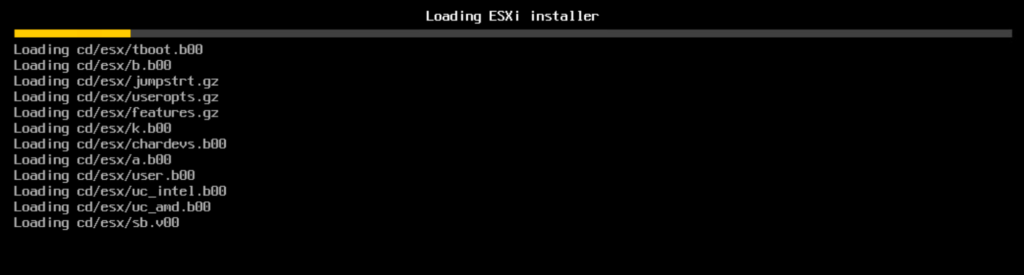
Normal ESXi-boot proceeds until you arrive at the stage where the installation-script is being kicked-off (KICKSTART).
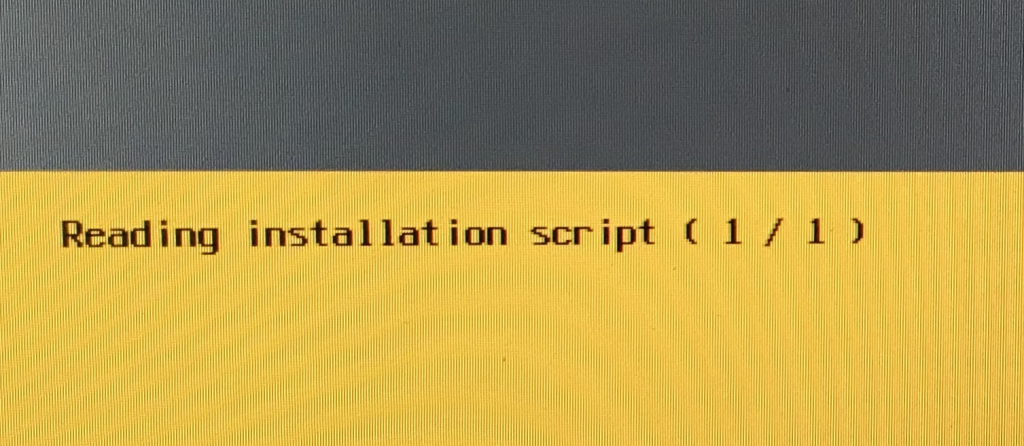
The default KS-script is dynamically generated by the imaging-processes running on the appliance. The KS-script configures the following items:
- Initialization and partitioning of the bootdisk (–firstdisk=”ahci,vmw_ahci,VMware,usb”, notice only SD/USB disks are supported!)
- Setting the default password (EvoSddc2016!)
- Assinging IP address/netmask/gateway for first NIC
- Setup DNS and NTP
- Enable SSH
- Create two (Management/VM Network) standard vswitch portgroups
- Enable LLDP/CDP
- Enable vmk0 management traffic
- SuppressShellWarning
- Set the hostname
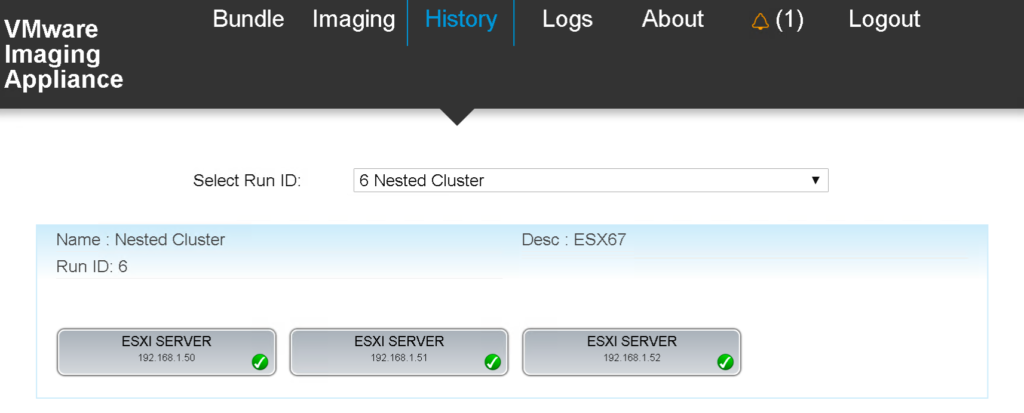
Once the server has been deployed (includes an additional reboot) you can zoom into the imaging process (History menu).
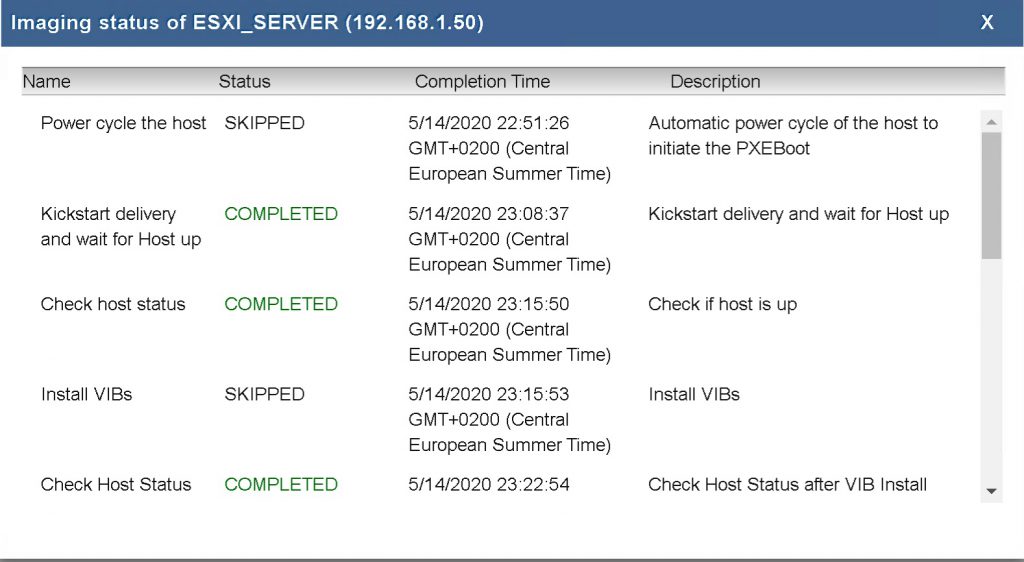
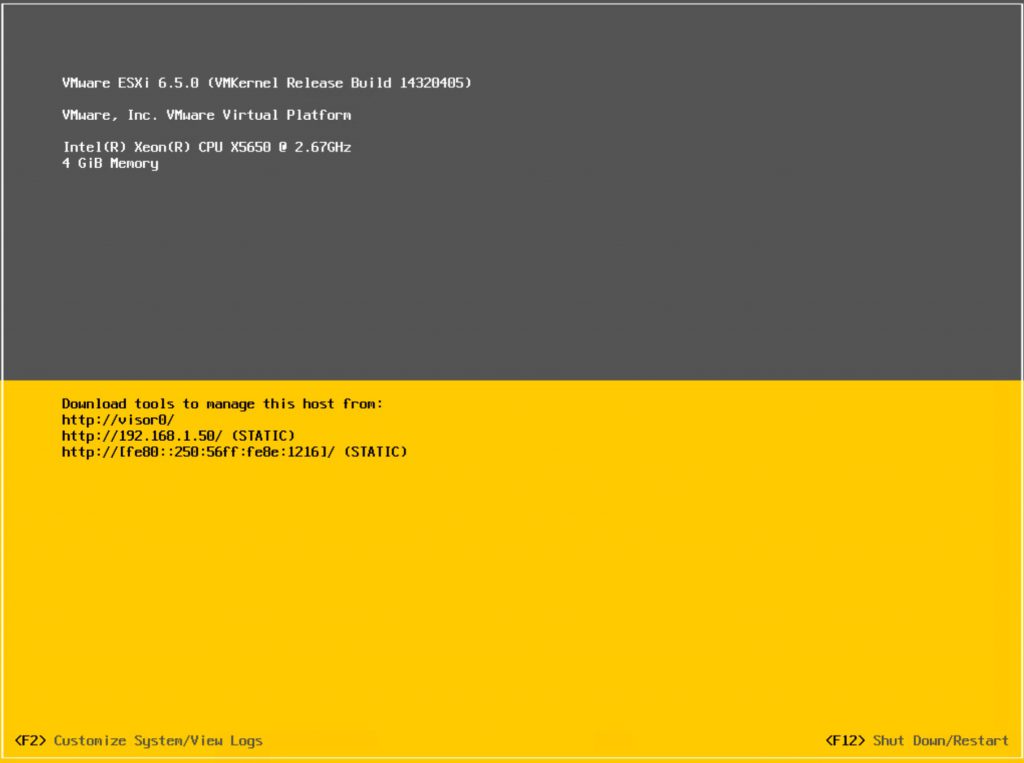
All-in-all a very convenient way to image your server! It even gets better if you deploy a bunch of servers.
But… the bootdisk restriction is preventing us to install on any other type of bootdisk like those attached to a local array-controller. For the homelabbers amongst us, the nested-VM imaging restriction is another showstopper. Most of the configuration is contained in packaged jar-files and we cannot change many of the important configuration-items externally (although I suspect there is a hidden and undocumented API somewhere).
Therefor, I have spend some time debugging and reverse-engineering the inner working of the appliance processes. This resulted in three UNSUPPORTED workarounds… so please, keep in mind, this is not for the faint hearted and I cannot guarantee flawless operation for everything explained below! —USE AT OWN RISK—

- Custom kickstart-url to allow local boot-device (and more)
- Change existing kickstart-file to allow local boot-device (and more)
- Disable the dhcp-restriction to allow imaging nested ESXi-VM’s
1. Custom Kickstart-url
As explained before the configuration of the target-server uses Kickstart. The kickstart file (ks) is located in a packaged jar-file and therefore cannot be changed easily. For the custom url to work you first need to make the imaging-server aware of an external ks-file that is located in an accessible folder on the appliance. Secondly, you need to use an available http-server for hosting the ks-file.
- PRO: you can create and change a custom ks-file
- CON: variables entered for networking and host names are not propagated to the custom ks-file
So, let’s investigate! From the log- and configuration files on the appliance I could find the following relevant configuration items:
via.ks.port=8085
via.pxe.linux.http.config.file=/var/lib/tftpboot/pxelinux.cfg/default
  >> contains: ks=http://192.168.1.235:8085/via/ks +++
bootPrefixPath = http://192.168.1.235:8085/via/CustomIso/VMware,_Inc./VMware-VMvisor-Installer-7.0.0-15843807.x86_64.iso/cd/esx/
Digging a little further I also found the source process that triggers the fetching of the ks-file and the actual url where the target ESXi-server can download it from. Keep in mind, these web-urls are only active and available during imaging!
Trigger > http://192.168.1.235:8081/kickstart
Fetching > http://192.168.1.235:8085/via/ks
The /via/ks path is nowhere to be found on the appliance because it’s hosted by a process in the packaged imaging-service jar-file. The CustomIso path however is accessible and contains the extracted version of the uploaded ESXi-ISO image, including the relevant pxelinux.cfg/default file in which we can change the reference-url to the local ks-file.
# vi /var/lib/tftpboot/CustomIso/VMware,_Inc./VMware-VMvisor-Installer-201912001-15160138.x86_64.iso/pxelinux.cfg/default

FROM:
ks=http://192.168.1.235:8085/via/ks +++

TO:
ks=http://192.168.1.235/ks +++
Next step is finding a locally available webserver. I did this by looking at the process:port table (netstat -lntp) on the appliance.
Processes and ports:
...
tcp     0 0.0.0.0:80 0.0.0.0:* LISTEN 628/nginx
tcp6    0 :::8081 :::*         LISTEN 1494/java
tcp6    0 :::8085 :::*         LISTEN 1157/java
tcp6    0 :::443  :::*         LISTEN 628/nginx
tcp6    0 :::8445 :::*         LISTEN 1157/java
tcp6    0 :::5480 :::*         LISTEN 922/vami-lighttpd
...
You should recognize some common webserver related ports that you could use. After some testing it got clear the nginx-webserver on port 80 was the best and easiest to use. This is in fact the webserver for hosting the Cloudbuilder GUI. Port 80 gets redirected to 443 and is not used for anything else afterwards. Perfect to host our custom ks-file! To make this work you need to change the following code:
# vi /etc/nginx/nginx.conf

FROM:
server {
        listen 80 default_server;
        listen [::1]:80 default_server;
        return 301 https://$host$request_uri;
    }

TO:
server {
        listen 80;
        listen [::1]:80;
        root /var/lib/tftpboot/KS;
        location /KS {
                autoindex on;
        }
    }
Don’t forget to restart the nginx-service for changes to become effective!
systemctl restart nginxThis now means you have converted the nginx redirect-feature to a download-link for the ks-file. Last step is to prepare a custom ks-file for your ESXi-server installation. Below an example!
# vi /var/lib/tftpboot/KS/ks

CONTENT:
vmaccepteula
clearpart --alldrives --overwritevmfs
install --overwritevmfs --novmfsondisk --firstdisk="local,ahci,vmw_ahci,VMware,usb"
rootpw VMware1!
restrict default kod nomodify notrap noquerynopeer
restrict 127.0.0.1
driftfile /etc/ntp.drift
server 192.168.1.1
/sbin/chkconfig ntpd on
/etc/init.d/ntpd start
vim-cmd hostsvc/enable_ssh
vim-cmd hostsvc/start_ssh
esxcli network vswitch standard portgroup add --portgroup-name "VM Network" --vswitch-name vSwitch0
esxcli network vswitch standard portgroup set -p "Management Network" --vlan-id 0
esxcli network vswitch standard portgroup set -p "VM Network" --vlan-id 0
/etc/init.d/hostd stop
while [ $( ps -v | grep hostd-worker ) ]; do sleep 1; done
cd /etc/vmware/hostd/
sed -i "1a<mangementVnics><nic id=\"0000\">vmk0</nic></mangementVnics>" hostsvc.xml
chmod 1644 hostsvc.xml
/etc/init.d/hostd start
sleep 100
esxcli system settings advanced set -o /UserVars/SuppressShellWarning -i 1
vim-cmd hostsvc/disable_esx_shell
vim-cmd hostsvc/stop_esx_shell
This completes the implementation of a custom kickstart file hosted by a local webserver on the appliance. Do your tests and adapt to your needs!
2. Change existing kickstart-file
In this example I will show you how to change the default jar-files that contain the main imaging-service functionality. As an example I will show you how to change the default bring-up password and firstdisk-types for booting ESXi. There is, or course, a lot more possible but I leave it over to you to decide what you need.
- PRO: original kickstart used with inclusion of all variables (except for boot device)
- CON: need to hack the packaged jar-files
To change the default kickstart behavior of the imaging appliance we need to change the two jar-files contained in the services folder below:
/opt/vmware/evorack-imaging/services

> via.jar
> evorack-imaging-esxi-service-0.0.1-SNAPSHOT.jar
You will be needing the jar-tool to unpack and repack the jar-file. Make sure it is installed on your jumpbox! Next, unpack the jar-file and change to the listed folder:
# jar -xvf evorack-imaging-services/via.jar
# cd BOOT-INF/classes
In via.properties we can change the default bring-up password.
via.defaultpassword=VMware1!
via.esxi.virtual.password=VMware1!
Then the same procedure for evorack-imaging-esxi-service-0.0.1-SNAPSHOT.jar
# jar -xvf evorack-imaging-services/evorack-imaging-esxi-service-0.0.1-SNAPSHOT.jar
# cd BOOT-INF/classes
In esxi_template.ks we can force the firstdisk kickstart item to support local boot devices:
FROM:
install --overwritevmfs --novmfsondisk --firstdisk=$disktype

TO:
install --overwritevmfs --novmfsondisk --firstdisk="local,ahci,vmw_ahci,VMware,usb"
Once changed you need to re-package the jar-files with:
jar -cvf0m <name>.jar META-INF/MANIFEST.MF *
-f for target jar-file
-0 for uncompressed (needed for Springboot)
-m for Manifest inclusion
Finally you need to copy these ‘fixed’ jar-files back to the services folder on the imaging appliance and restart the imaging-services
# /opt/vmware/evorack-imaging/imaging-service.sh restartYou will now be able to install on local boot disks!
3. Disable the dhcp-restriction
The default behavior for VIA is to ignore certain MAC-address prefixes as a target-host for imaging. This is understandable but for lab-environments a potential problem. As seen earlier many of the VIA configuration is held in packaged jar-files, as is the restriction for booting from nested ESXi-VM’s. To fix this, locate this jar-file and copy it to your linux or macOS jumpbox.
/opt/vmware/evorack-imaging/services/via.jarYou will need the jar-tool to unpack and repack the jar-file. Make sure it is installed on your jumpbox! Next, unpack the jar-file and change to the listed folder:
# jar -xvf evorack-imaging-services/via.jar
# cd BOOT-INF/classes
In this folder you need to edit dhcp-request-classifier.js and change the listed fragment:
vi dhcp-request-classifier.js

FROM:
function isVM(request) {
        return request.clientMacAsString.indexOf("00:50:56") == 0 ||
                        request.clientMacAsString.indexOf("00:50:69") == 0 ||

TO:
function isVM(request) {
        return request.clientMacAsString.indexOf("00:51:56") == 0 ||
                        request.clientMacAsString.indexOf("00:51:69") == 0 ||
Once changed you need to re-package the jar-file with:
jar -cvf0m via.jar META-INF/MANIFEST.MF *
-f for target jar-file
-0 for uncompressed (needed for Springboot)
-m for Manifest inclusion
Finally you need to copy this ‘fixed’ jar-file back to the services folder on the imaging appliance and restart the imaging-services
# /opt/vmware/evorack-imaging/imaging-service.sh restartYou will now be able to boot your nested ESXi-VM from the tftp-server!


Compliments; Looks good. We will try it out in our environment. It will help us to evolve in the automated deployments. But also the nested deployments in my own home lab.
Thanks.